As I near the end of my schooling, this project for advanced armoring is building a 1911. I’ve been looking forward to this ever since I started working towards my associate’s degree in the science of firearms technology two years ago.
12 Likes
Good luck
I’m here for advice if you need
The phantom jig will take some time to cut the rails and barrel seat
Luckily the sa kits ussualy don’t require much fitting
6 Likes
I’m super excited for you @Tactical_Reviews. Just an idea, you should try auctioning your first one. I would bud in it!
4 Likes
As an 80% build, I can’t. Besides, Stealth Arms is a bit high on the price. $1090 for the build kit, and about $200 for the jig. I’m glad this was included with my tuition. Other colleges give free laptops, I’ll take this any day.
5 Likes


Similar to 1911builders.com, 1K+ for the kit $250 for the jigs. With 1911builders top quality parts, solid jigs, and great communication, I’d bet you have same results with Stealth.
Money can be saved with some shopping around, good frames out there for good prices, just ordered a full length frame/ tac rail 416 SS around $190 with shipping. GI Carbon Steel Frames $100-$150. Build kits with sights and grips RIA brand $450 and up, $600 for long slide. (6" 10mm build in the near future!)
5 Likes
Everything looks to be of very good quality.
3 Likes
Yep. The model A seems to have aged much better than the model T. You can still buy kits to build model A replicas and model A hotrods, but the model T kits seem to be limited to ‘T bucket’ hotrods.
1911 kits seem closer to the model A, in that you can do an ‘old school’ GI .45 build, or a doublestack frame with various calibers to choose from.
5 Likes
When I look at anything else from the period, it just seems ancient and comically outdated. But, not so when I see a 1911.
5 Likes
I would ask if you have all the needed tools first before you start
4 Likes
Lol, I’ve got them all.
3 Likes
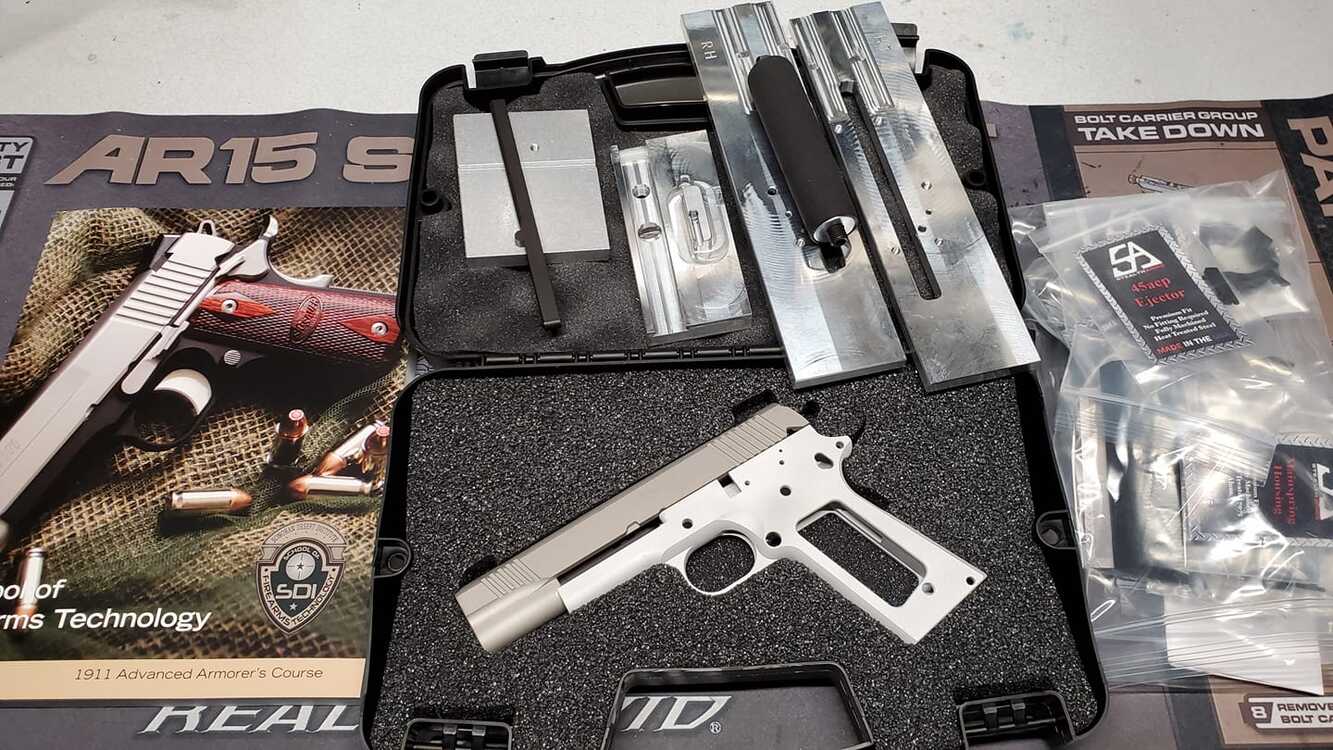
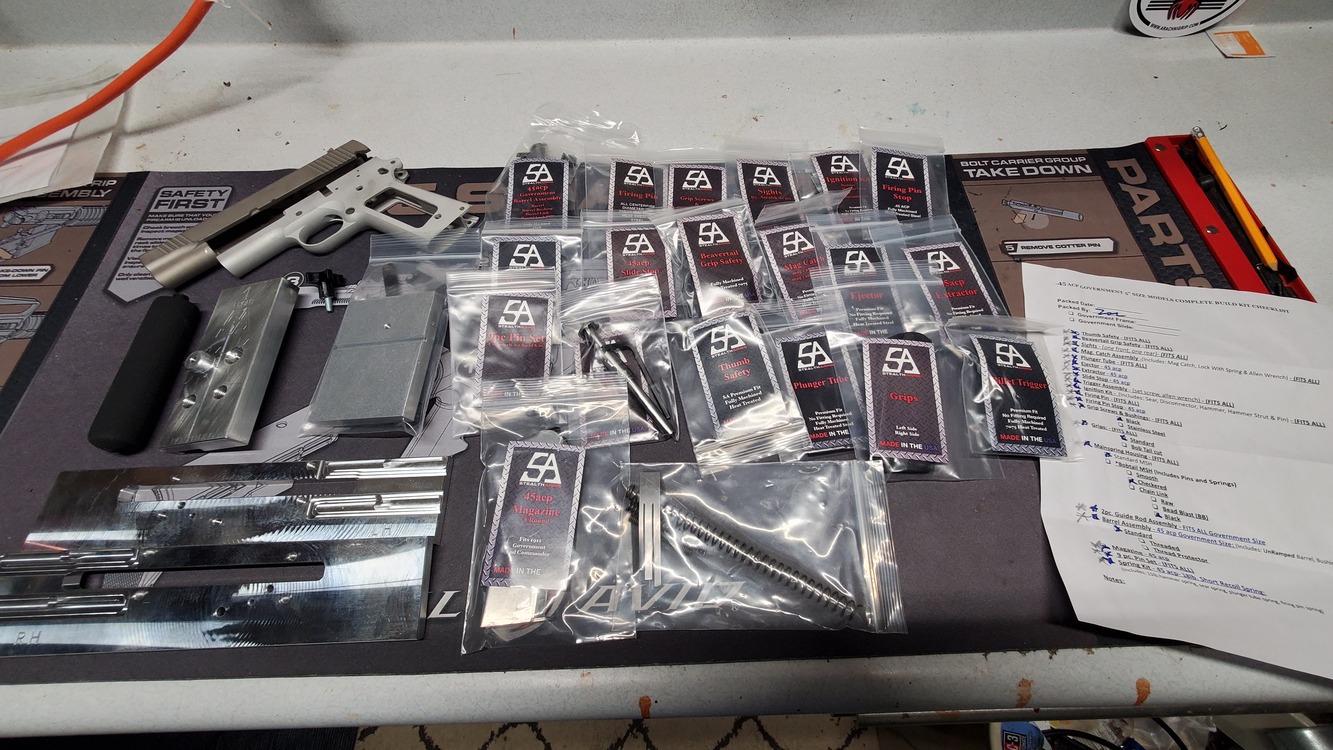
I got started on my final project for the advanced armoring course at SDI.EDU. Over the next three weeks I’ll be going through the steps. I made sure every part was here. Stealth Arms makes a very good kit. Pricey, but the quality is really up there.
First step after doing inventory was mounting the frame in the jig. The pins were very snug, no play that I could feel between the frame and side plates
Cutting the guides on both sides was slow. Adjusting the knob with very small movements worked out very well. I also made sure everything was well lubed.
I marked the starting point and cut 1.9 turns giving me a perfect .061" depth.
Rails are cut, had a little bit of chatter, but another pass cleaned that up.
Getting a good fit took about an hour. I used a black marker to find my high spots that needed to be taken down. Once I had it to the point I could get the frame and slide together, I used a little 220 lapping compound. The end result was a very smooth fit and no side to side movement between the frame and slide. I’ve noticed this fit is the difference between an expensive 1911, and a lower budget 1911. The SA TRP 1911 I have is very tight in this area, whereas the other 1911 which comes in at about half the price has play. I noticed this when I was testing these firearms that when the slide came back, the barrel and sights didn’t always align the same. I didn’t have this issue with the TRP.
So ends my work today. Oh ya, I cut the barrel channel, but didn’t get a picture of that.
6 Likes
Today I started polishing the frame. A lot of work goes into it. Not sure if I’m going to polish to a total mirror finish, it’s going to get a few scratches anyways. So far, everything is really very easy. The millwork is far less involved than on an AR receiver. But all the little stuff is starting to add up in time. I spent about three hours of polishing. Started with 400 grit wet, then 800 grit wet, finally, 2500 grit wet. Switched over to the dermal and hit it with 220 grit lapping compound, then rubbing compound. Safety first, right? Need to protect the eyes and the beard. If you’ve never got your hair caught in something spinning, consider yourself lucky.
I haven’t decided if I’m going to polish the slide or leave it two-tone like this. I’m kind of leaning towards two-tone
6 Likes

I’m amazed at how much this kit costs. The parts are top quality, I will say that. I’m still waiting on my class 07 federal firearms license, they’re really backed up. Once that’s all finalized, I can manufacture firearms for sale. I’ll be looking into finishing kits like this and serialize them for sale. I’m really enjoying this.
6 Likes
I’d be careful with selling them
Honestly the cost of a whole stealth kit being about 1100 dollars is to high to have a profit margin in selling them with out custom additions
Further more the labor cost in building a pistol alone negates the profit if you use there kits
4 Likes
That’s a lot and I don’t see a frame.
4 Likes
Enough money left over for duct-tape? 
4 Likes
