I don’t do many builds so I’m documenting this as I progress. I was asked for a final picture after completion, and that’ll happen, but if there’s anyone like me reading this, who doesn’t assemble many ARs, maybe this’ll be of use to them. Rather than spreading out the build with many posts and having folks comment between them, I’ll come back to this first post and just keep editing and adding to it as things progress.
The handguard is a Lancer Carbon Fiber. I looked at various aluminum handguards at the local manufacturer/FFL dealer and their appearance had no appeal for me. Also, aluminum is very cold, sucking the heat out of the hands, and Maine gets very cold. So I really didn’t want aluminum; I try to stay away from it and hands as much as possible. Carbon fiber, done right, is quite strong. The Lancer handguard isn’t installed the same way a standard handguard is, the first part is glued in place. Follow the instructions for the handguard of your choice. There are installation differences even between other carbon fiber handguard manufacturers. This installation was different enough that at first I wondered what language the istructions were in. But sit down and slowly follow the instructions and you can figure it out, the same as I did. What was throwing me was the “extra” receiver extension nut and the way that Lancer had the barrel nut threaded into it for shipping.
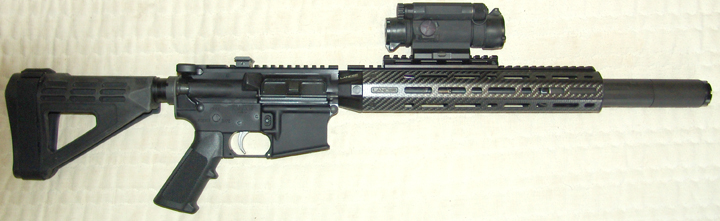
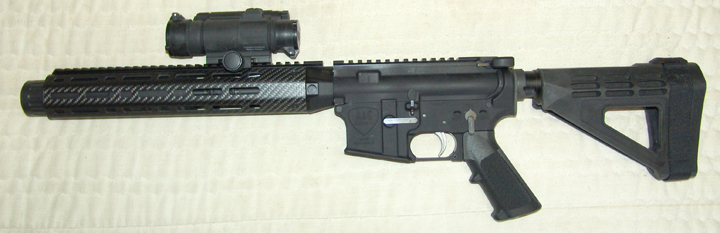
First the receiver extension nut is screwed in place on the lower after having prepped the threads on the upper and inside the extension nut. That consists of removing/breaking through the anodize specifically designed to resist exactly that. I tried the suggested Scotch Brite and that didn’t work worth a damn. So I resorted to using a scribe (a sort of pencil for metal marking) and an automatic center punch. Eventually it was prepped to my satisfaction. The nut needs to be lined up with the gas tube and the rail on the handguard needs to be lined up with the rail on the upper as the red loc-tite cures. The gent at the local manufacturer suggested forgetting about the gas tube holes and line up the rails. The gas would fix itself if that was done. That made sense to me so I put the handguard on the nut (temporarily), breadboarded it and sure enough that worked fine. I like to clamp things so that was next on my list of things to figure out. Then it struck me. Rather than having all sorts of clamps possibly damaging things I had the Comp M4 seen in the picture. That has a sorta longish edge and as the sight is clamped down it aligns the rail in both the side to side and vertical axis’. One clamp that does both axis and its built to damage nothing. Slick.
So after degreasing the threads it was time to apply the Loc-Tite and clamp it up for the cure time. The picture was taken after removing the clamp (the sight) today.
The handguard is in place on the receiver extension nut seen as a sort of cone butted up against the stripped upper, but the screws aren’t in place holding it on, and the over the barrel can (Amtak CQB-M) that the pistol will wear 100% of the time is just placed in it’s approx’ orientation inside. It’d going to be a fairly short suppressed rifle should I decide to change it’s status from pistol to SBR. But at birth it’s going to be an arm braced pistol. The rail and gas tube holes are in perfect alignment at least as far as my eye can determine by sighting down both rails. Too, the Comp M4 is the sight that it’ll wear at least at first since it does NV and this will be so equipt.

When the barrel comes in that work can be done. The low gas block needs to be positioned, the gas tube put in place, and the barrel torqued down. Unseen above, hidden by the carbon fiber handguard itself, the barrel nut is screwed into the receiver extension nut. It’s just a good place to store it right now as it waits for the barrel.


 I didn’t, but I do now.