Building a better Ak-47 front sight tool. Pt 1,2.

Have you ever gone to the range with a new AK-47, and the sights are way off?
You go and buy a cheap front sight tool just to do a quick adjustment, and the cheap tool bends instead of adjusting the front sight? Yeah me too.

(never do this. It is for entertainment purposes only)

Here is a picture of this hot garbage I purchased about ten years ago.
image

No pictures of the first part due to a brain fart. My apologies.
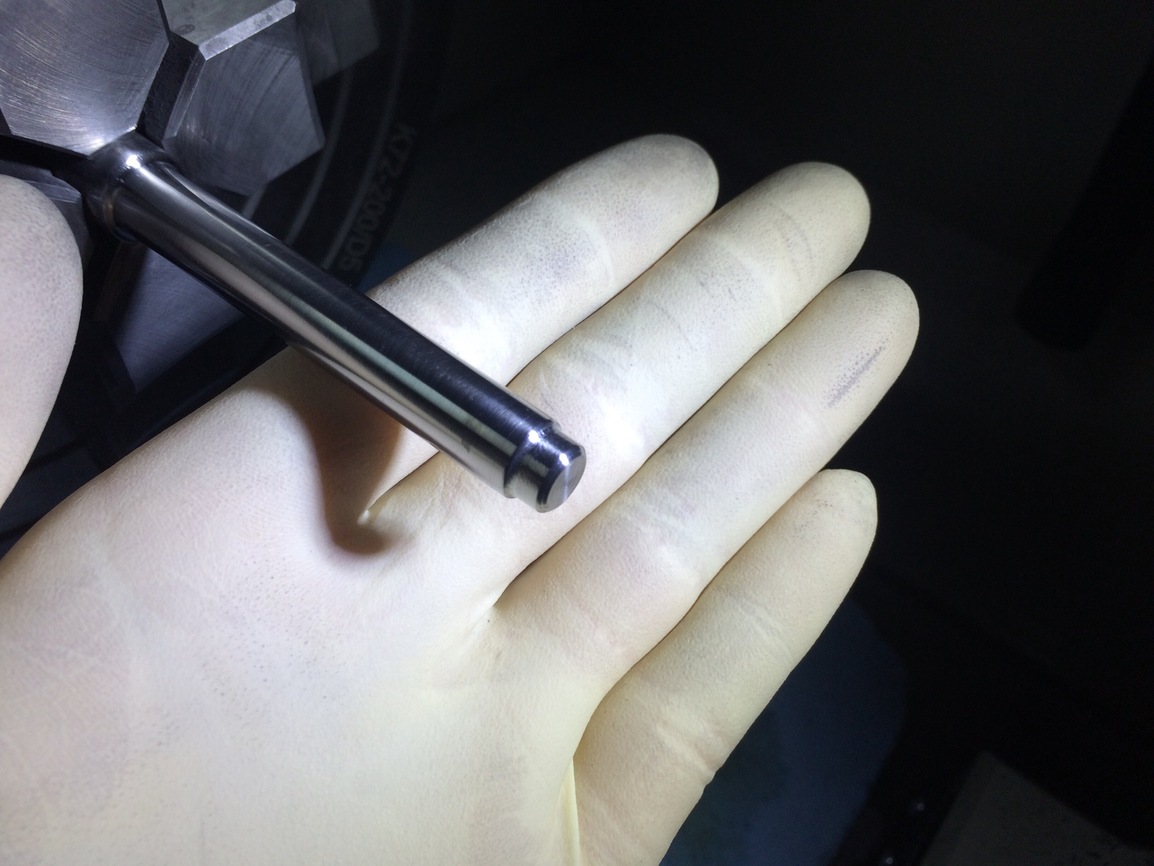
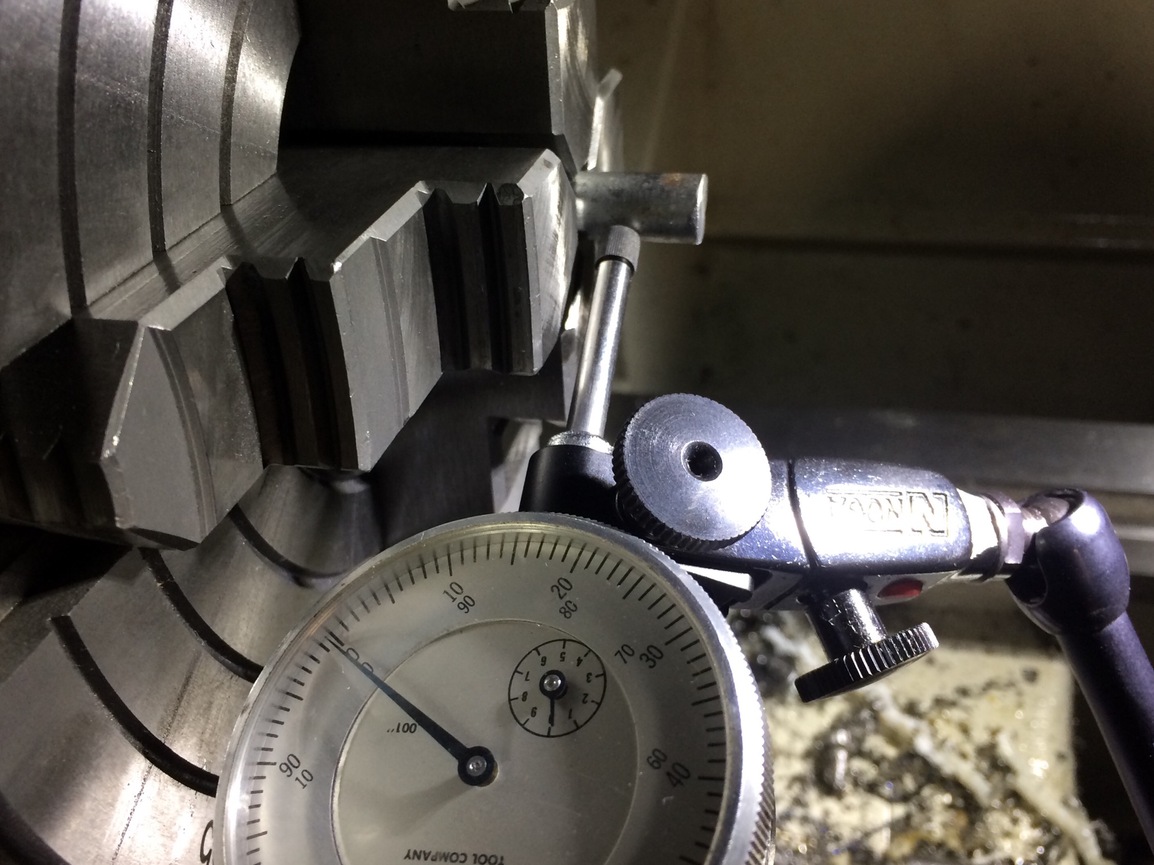
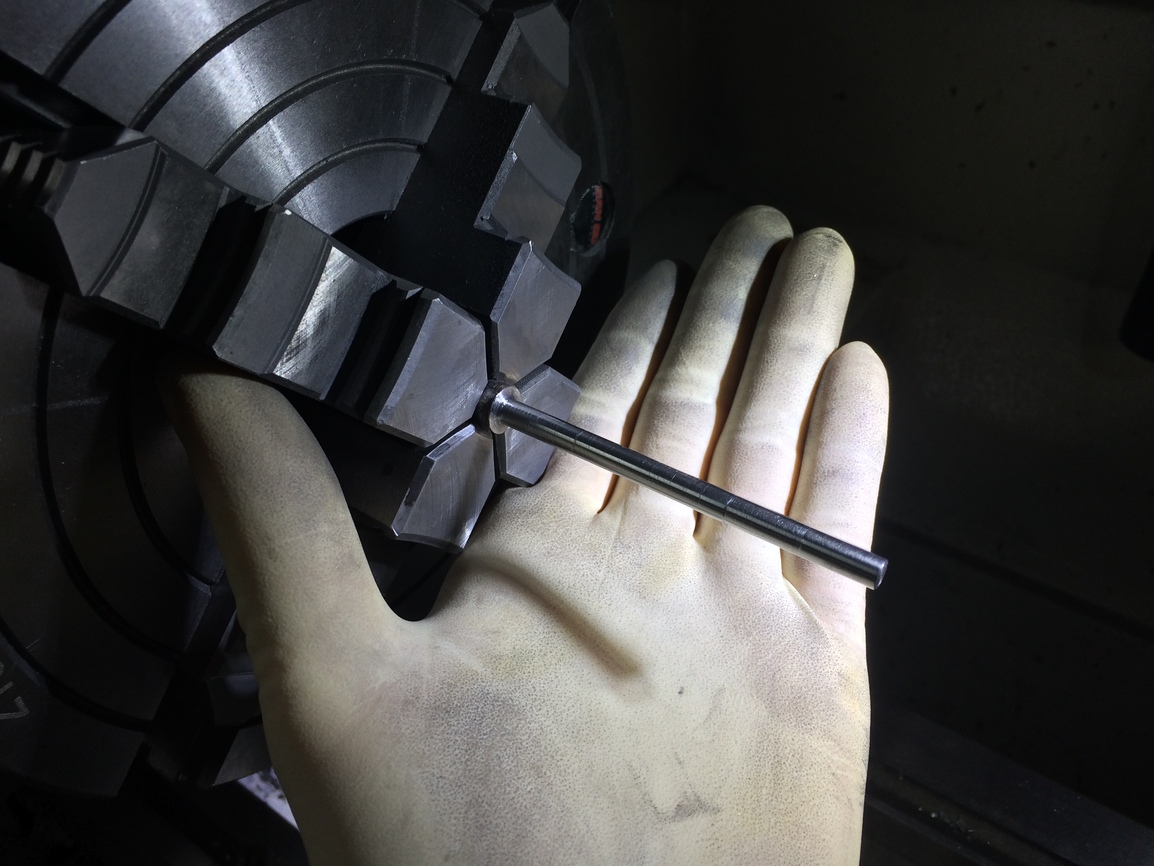
I put a piece of 2” round cold rolled 1018 steel in the 4 jaw chuck. Indicated to .001” faced the stock about .007”. Drilled a .625” hole in the center of the part, and parted to a thickness of ~.600”. Break the sharp edges of the part before fully parting.

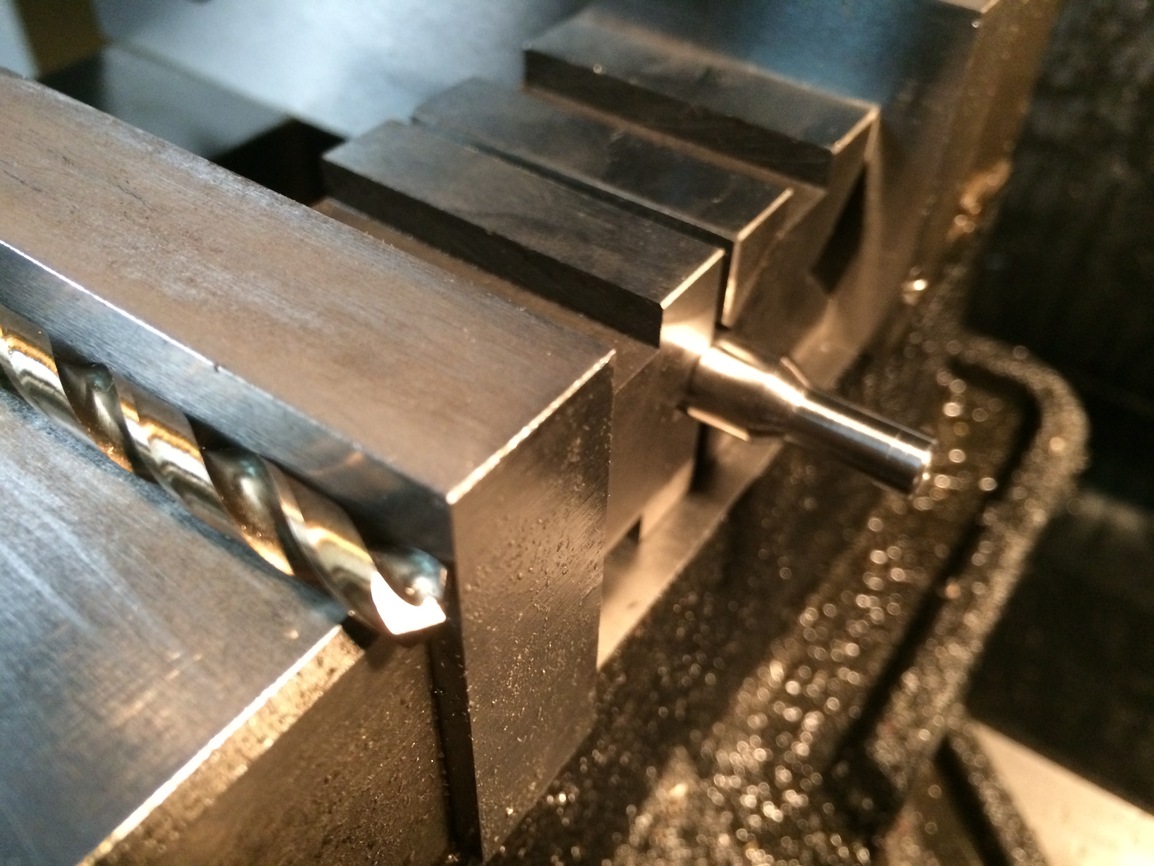
Now we can go to the mill. Install your freshly parted stock in the vice to cut some flats.
image
The flat cut was ~.035” from touch off from the surface. This should yield a flat surface in the (x) travel of ~.650”.

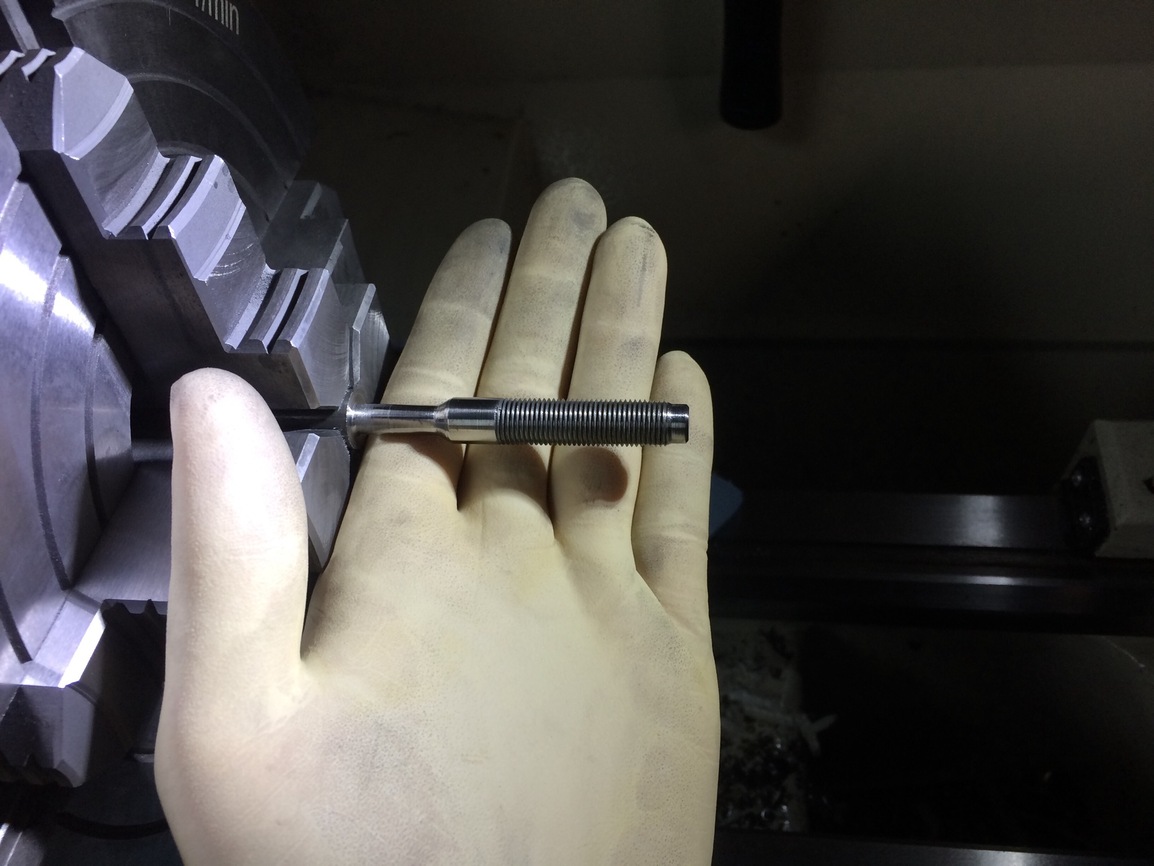
The threads I am shooting for is 10mm X 1.0, generally speaking when cutting metric threads subtract 1mm of diameter of the thread you want to cut to find the size drill bit to use.
For the more technical guys the formula is ( drill size= Basic major diameter of thread- %of full thread x pitch (mm) / 76.98). So for the thread I’m after 10mmX1.0 this is the calculation ( 70 X 1.0= 70 / 76.98=0.9093271) (10-0.9093271= 9.096729) rounding up 9.1mm drill bit. Being I’m in America I used a 23/64 drill bit. This is only a difference of .0011” in diameter.

Thank you to the two people that are still reading this thread.

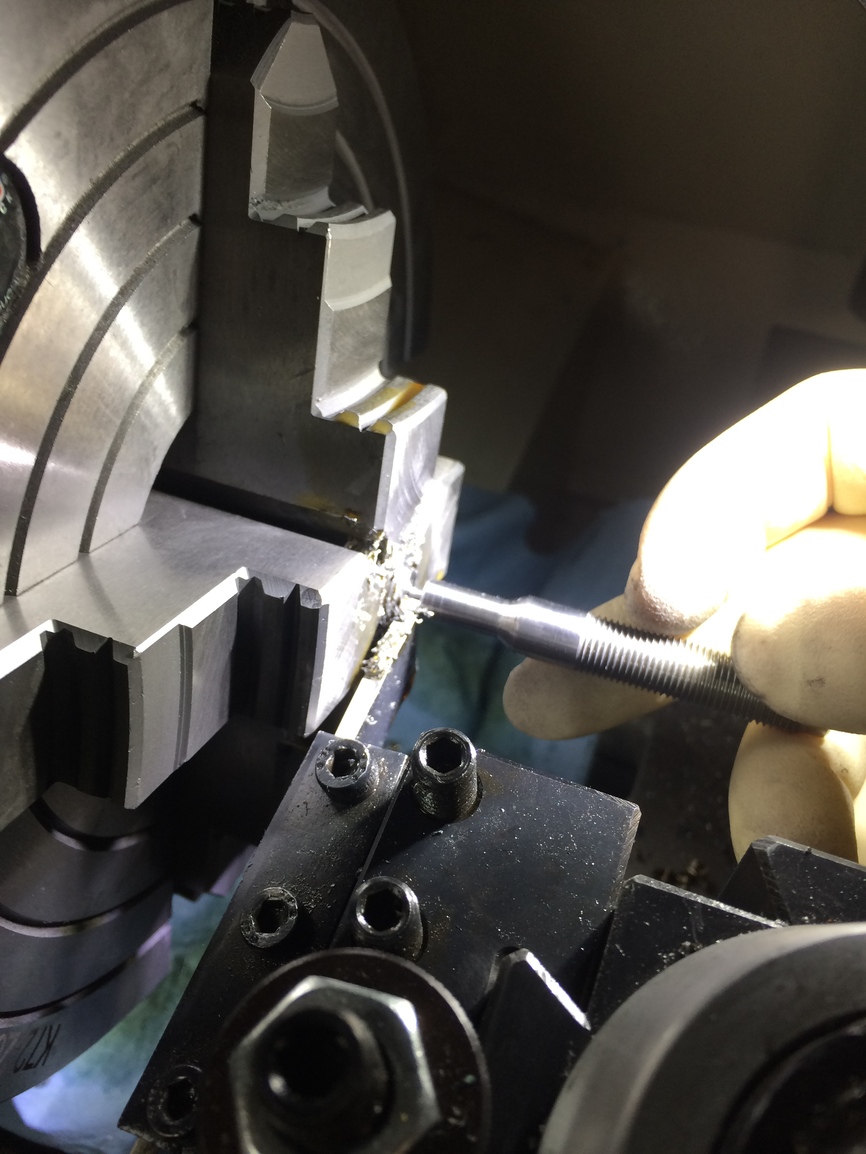
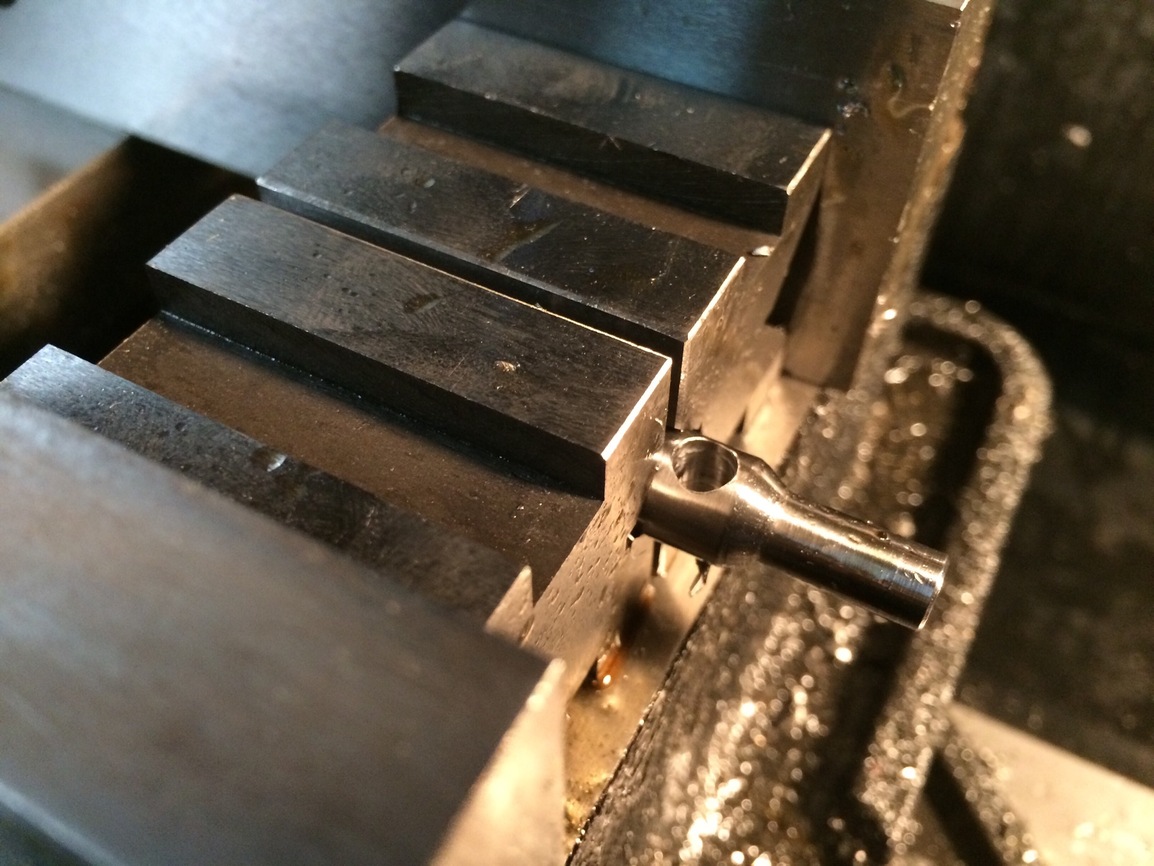
Drill through the part all the way through the other side. Power tap, or hand tap your threads.
image

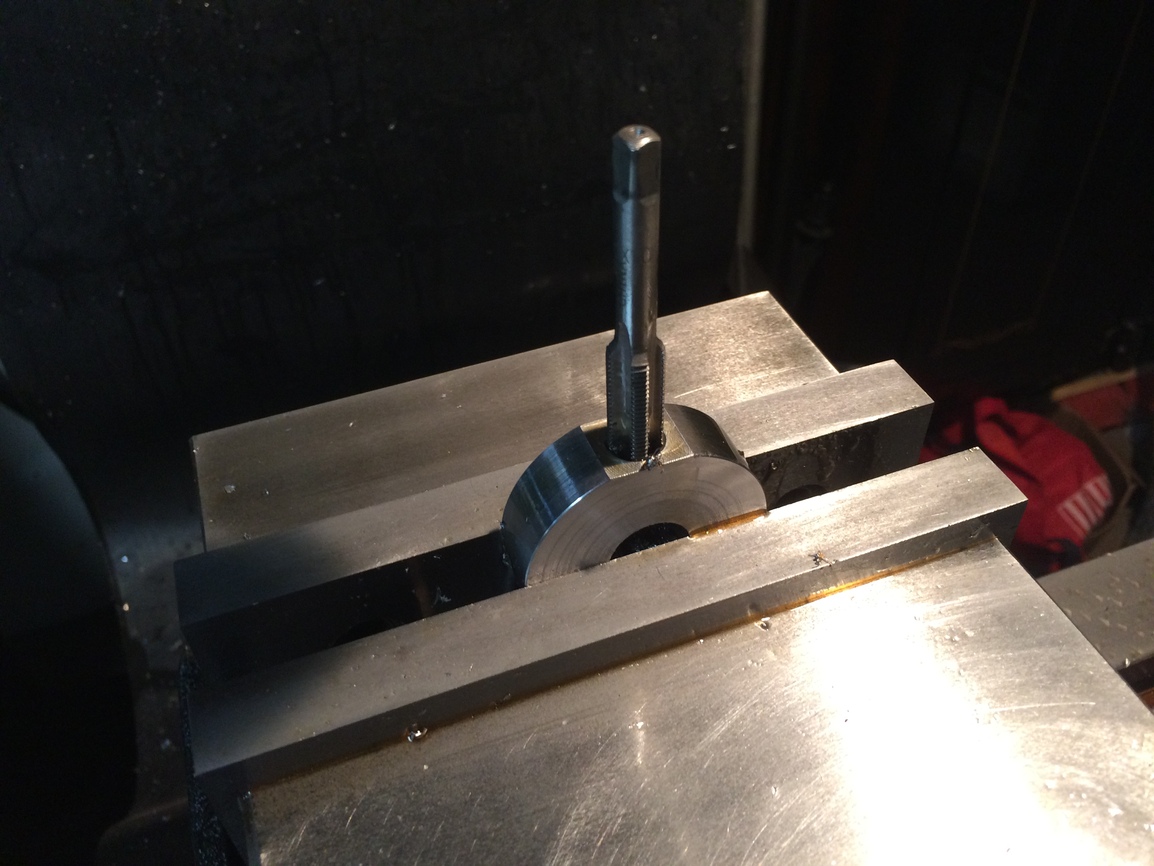
Chamfer the hole so it’s not sharp.
image
Remove your part and cut a flat 180 degrees.
image
The front sight barrel is .400” in diameter. I used a 27/64 drill to add some clearance for the drum.
image
Chamfer that side too, so it’s not razor sharp.
image
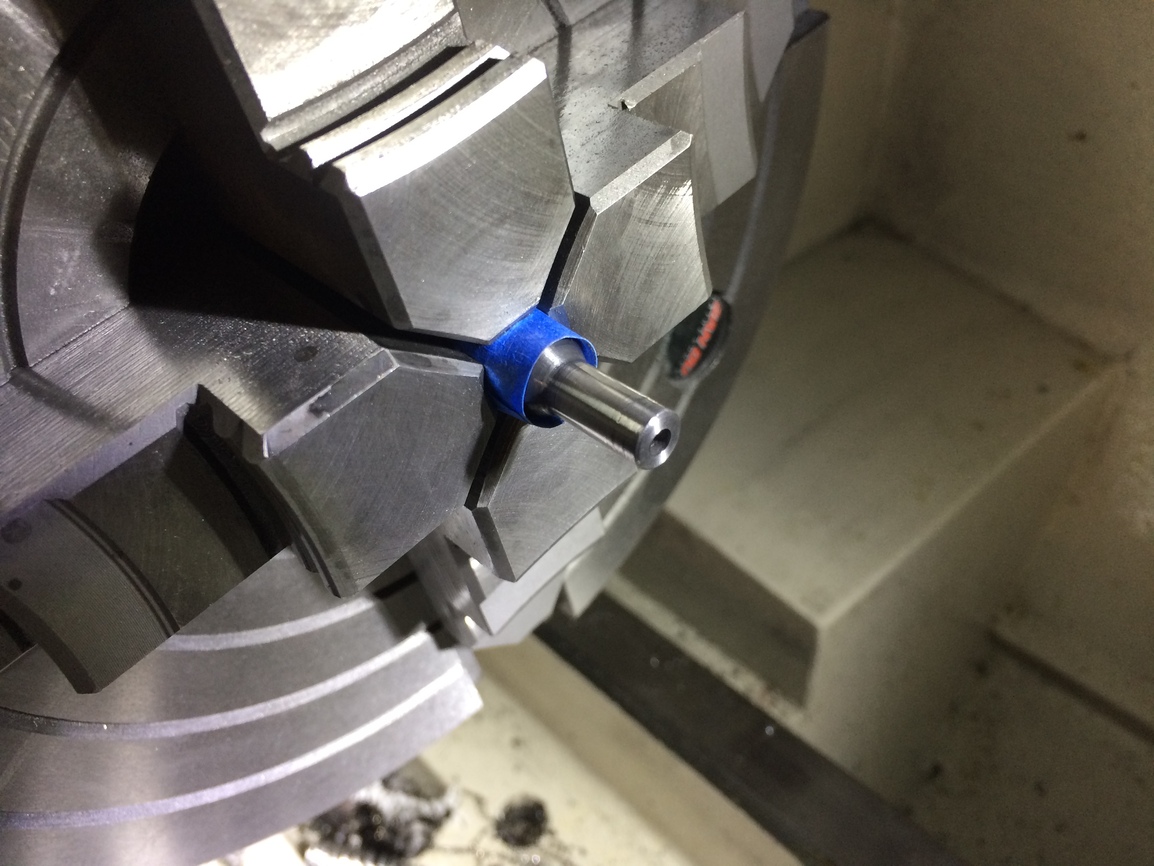
Now that we have to flats 180 degrees from one another we can clamp the piece in the vice horizontal.
image
Center a 5/8 end mill. Cut .300” on the x axis in both directions. Take small cuts at at time not at full depth if you have a smaller mill.
image
image
image
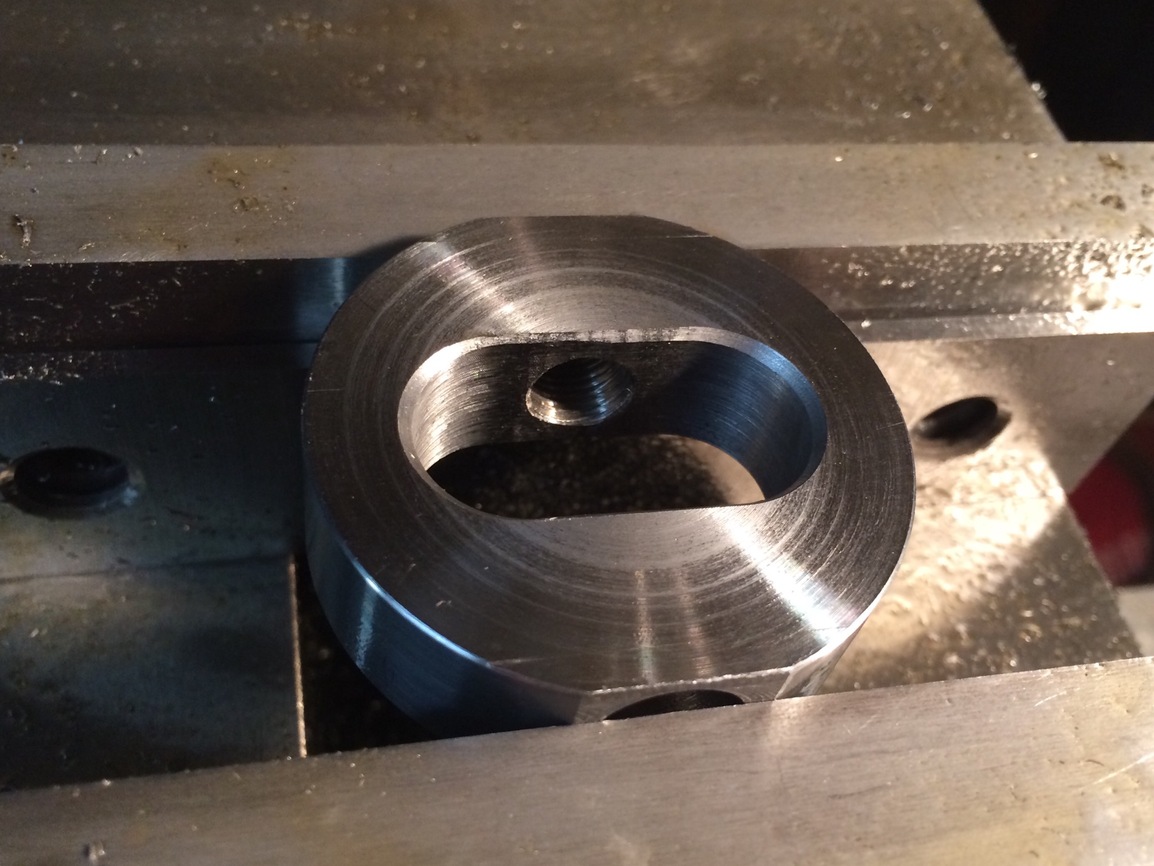
Chamfer both sides of the oval.
image image
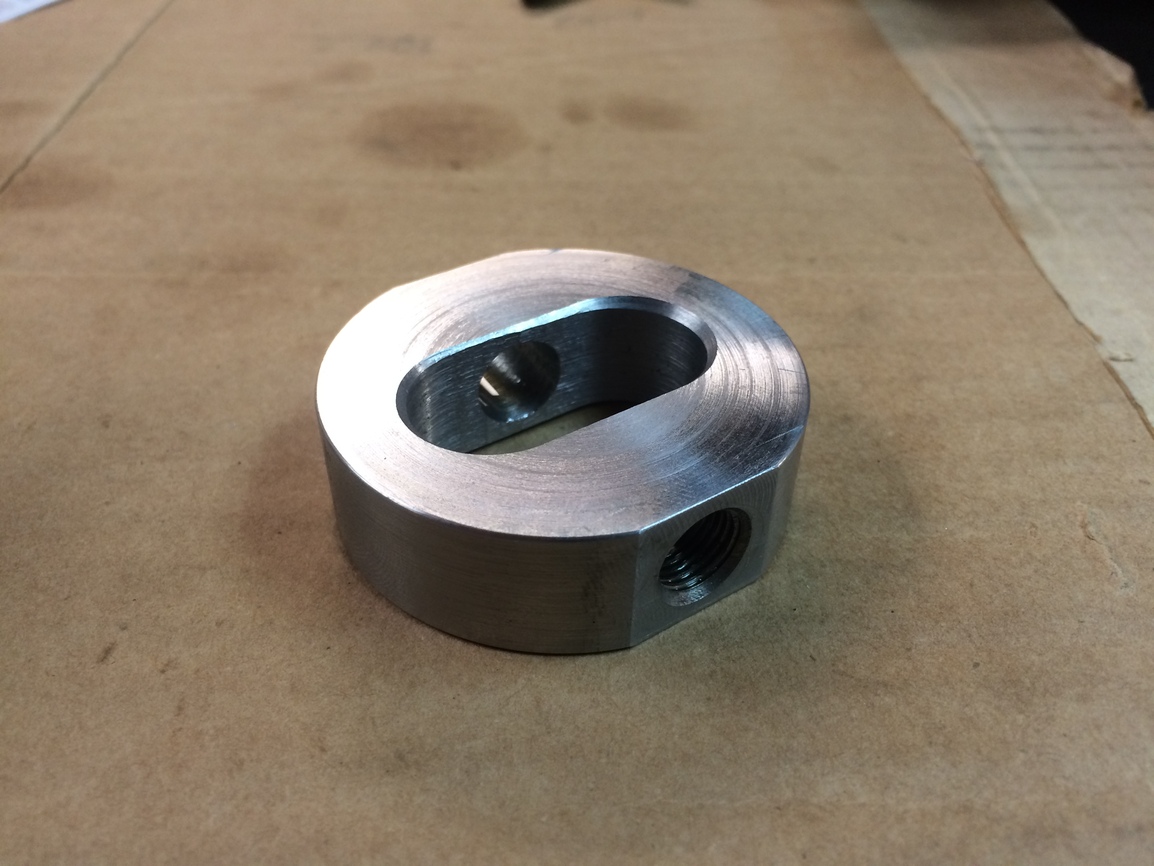
Now we have a good base to use.
image
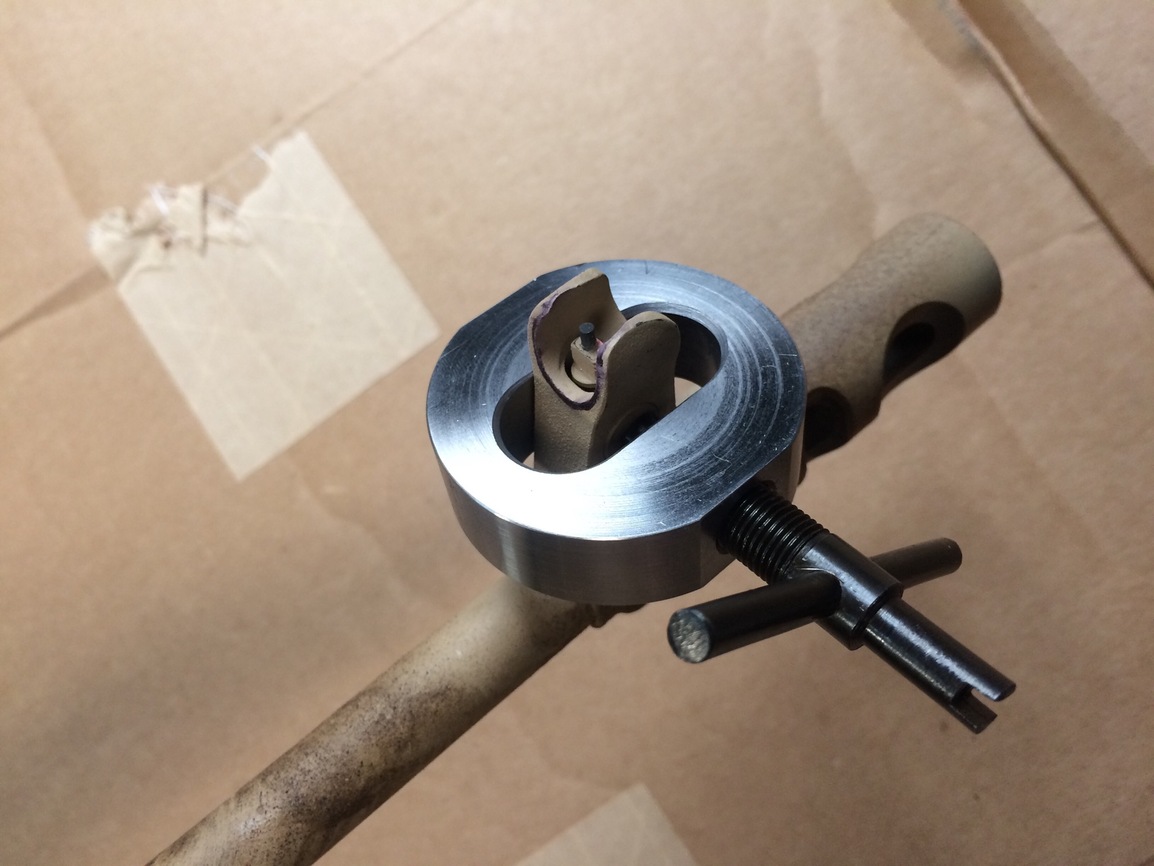
Remember, be safe and have fun.

5 Likes

how much to sent one north?

2 Likes

I wish I could make them cheap, but I can’t. At least not cheaper than the good ones that are for sale.

https://www.amazon.com/AKFST-Front-Sight-Adjustment-Tool/dp/B00510LEDQ

I don’t even know how they can make money at $35.00 a piece!

4 Likes

Ancient Chinese secret…

5 Likes

Ha ha ha!!! Awesome answer Brother!

4 Likes

I thought I could smell cutting fluids. LoL nice work brother!

2 Likes

Great job on the tool.
I bet it is wonderful to be able to just make the stuff you need.

Well done!

3 Likes

Thank you Brother. It is nice. The issue is that you chew up a lot of time drawing up the plans, and second guessing yourself.
I’m sure you know the feeling with all the 1911 builds!

I get nervous every time I watch one of your videos and you start to file a slide! I wish I had the control you have with a file.

3 Likes

I get it, but I would still love to be able to do what you can.

I have had an idea for something in my head for a long time now. Not having the time to prototype is one issue, but also not having a shop where I can fabricate stuff is another.

That is why it makes me happy to see when people can make stuff they need.

2 Likes

(Do not do any of this. It is for entertainment purposes only)

Time to make the forcing screw. Grab some 1/2” of 1018 steel and zero out in the 4 jaw chuck.


Face off and run a pass to get a base measurement.

Cut the stock down to .390”

The length of the part is 2.595” so make sure the part is .390 from front to back. You can use sand paper to blend in the measurements if the steel has to much flex during the cutting.

Cut a relief at about .320” and break the edges.

Thread 1.340” of the part for 10x1.0 thread.

Cut a relief .260” in diameter, about .540” long.
Now you can part the screw.

Wrap the screw in tape and re center in the 4 jaw chuck.

Center drill.

Drill center with a 7/64 drill bit to a depth of .500”

Now it’s time to make the T-handle.
Grab some .375 rod and center in the lathe.

Only have a half inch sticking out. Cutting to a diameter of .205”

Cut a half inch at a time and re center. This will help with deflection of the steel.

Part it and confirm measurement.

Time to move to the mill. Grab v blocks and center your Y-axis.

Grab a 13/64 drill bit (.203”)and drill through the part for the handle.

Debur as needed.

Time for the spinning wheel of death!!!

Give yourself about .130” of clearance.

Now debur the part as needed.

Now put the T-handle in the freezer and heat up the part.


Take the part and drift it into the screw.

Time to blue your parts!

Bam! Finished. Apply a light coat of oil.

Remember be safe and have fun!

3 Likes

Gorgeous!

3 Likes

Thank you Brother!

2 Likes

Very impressive. And well documented.
Keep them coming.

4 Likes

Awesome!
#@SWITCHPODTOOL&DIECOMPANY😉

3 Likes

Thank you Brother! I will do my best!

1 Like

Ha! Yeah I wish that was a reality!

2 Likes

whens mine being mailed north?

2 Likes

Money talks @srdiver!

I hope @ZEKESHOOTS, @Albert, @Glockshooter79 eventually see this thread!

2 Likes

Wow. That is awesome. Excellent work and documentation. I enjoyed chatting with you in the @ZEKESHOOTS stream.
I bet you could do some pretty cool AK parts/mods too.

2 Likes

Thanks Brother! That live stream was the best one I have heard, even as long as it was.

As far as AK stuff I will some day be loading up more Ak stuff I just need the time. On average I work 11 hours a day and I have a wife and little kid so time is almost non existent.

Here is a few quick Ak things I did. Nothing really cool.

2 Likes