HK G3A4 build part 1,2,3,4

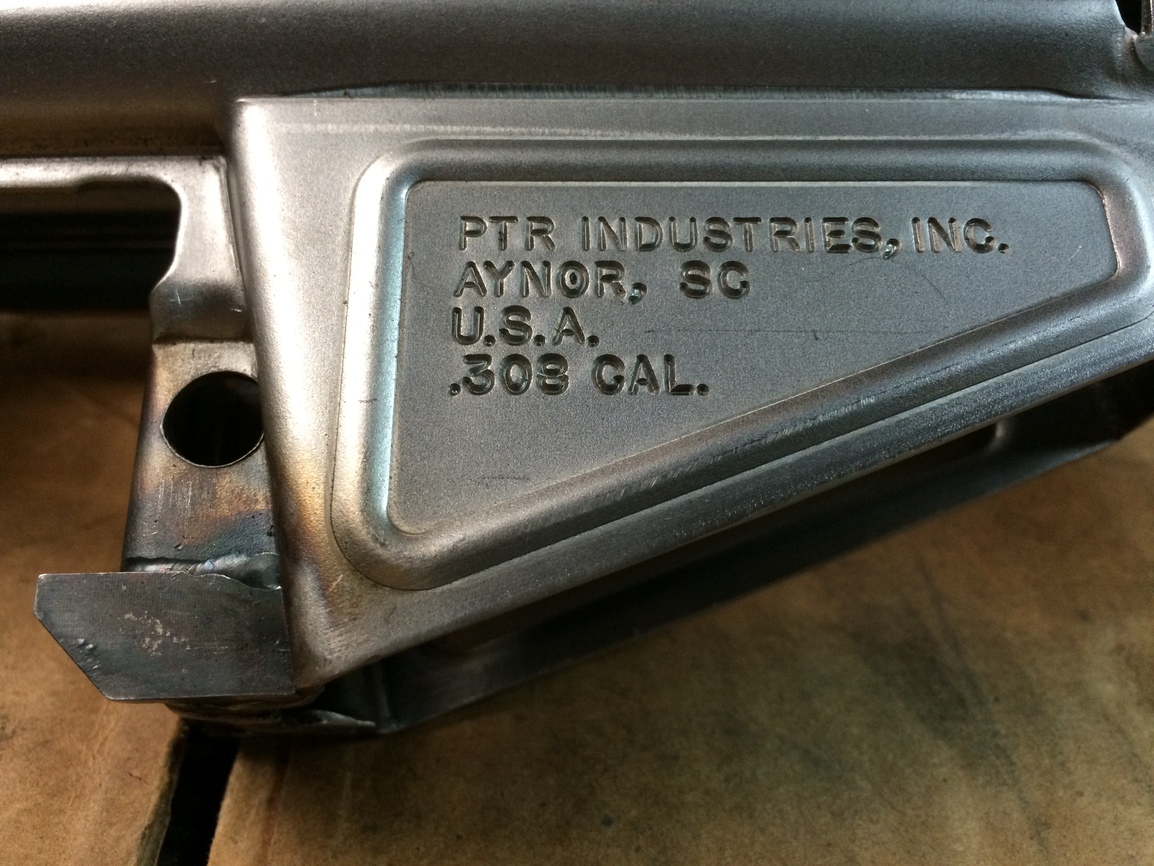
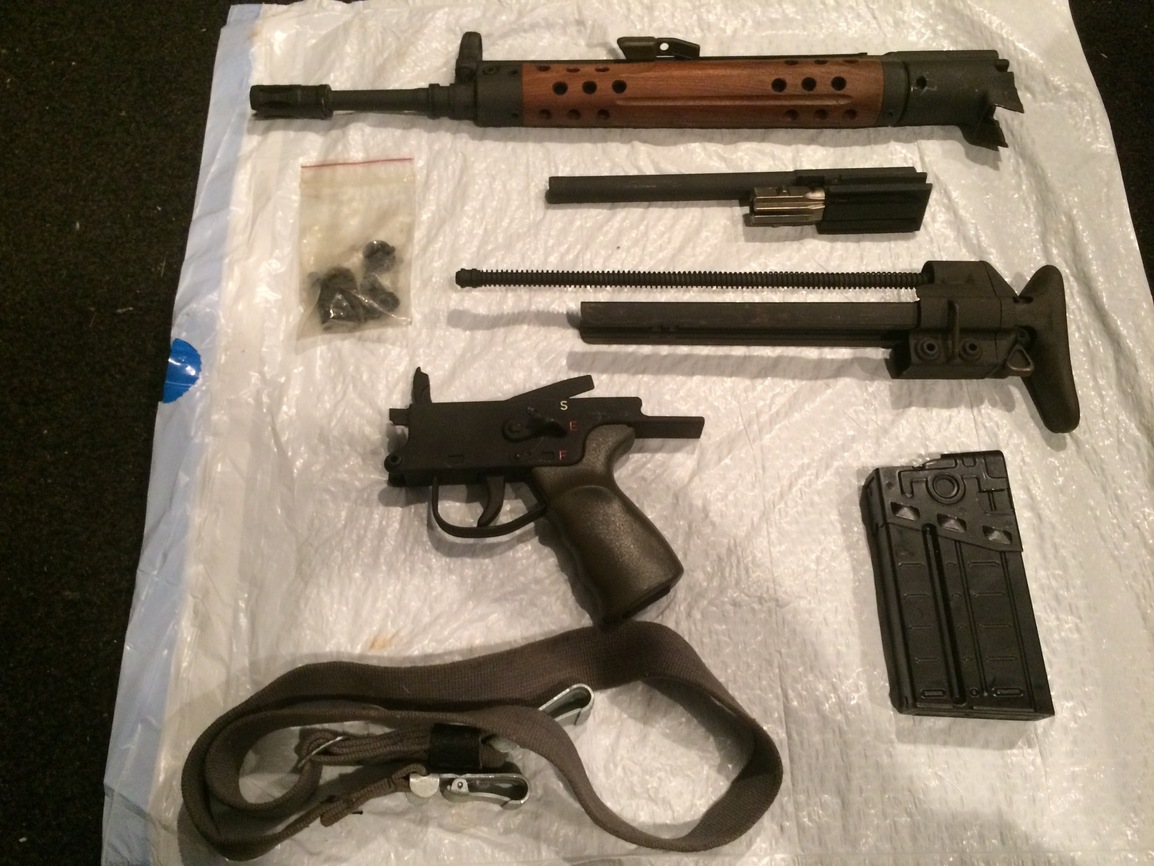
Hi everyone. I have very little free time in my life, but the time I do have I like to do some light smithing. I am fortunate enough to have found a HK G3A4 kit with barrel!
Before we get into this you should check into your local fed and state laws to stay legal and avoid any trouble from the batfe.
If you get a kit find out how many U.S. parts you will need to stay R922,and what full-auto blocking parts you will need to stay compliant. Do your research it’s cheaper than a lawyer.
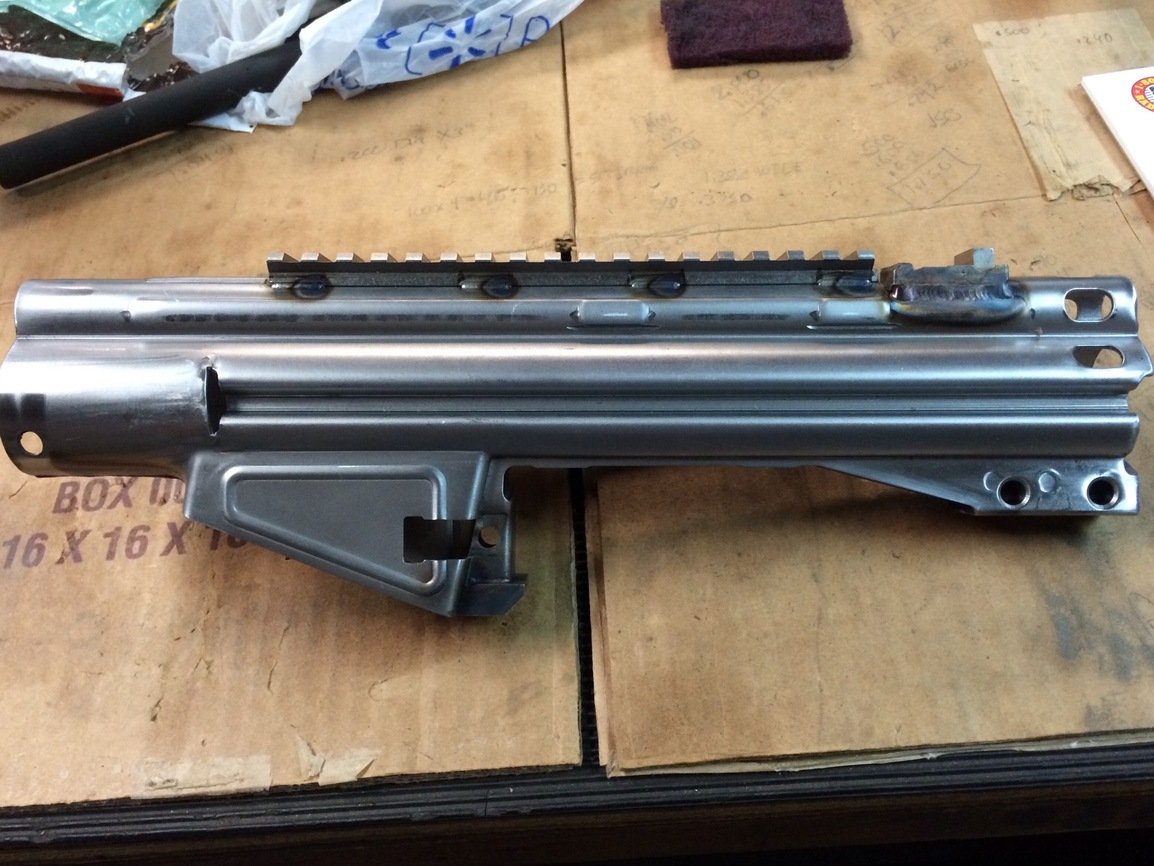
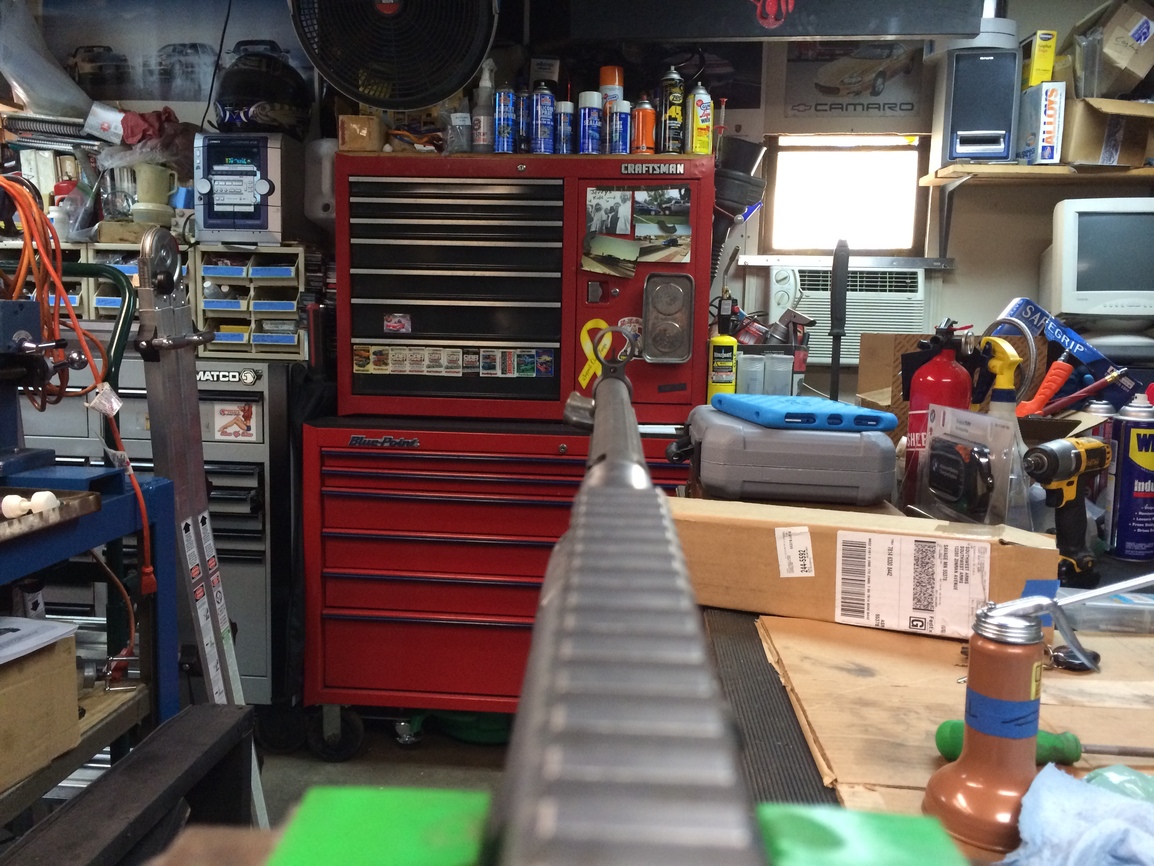
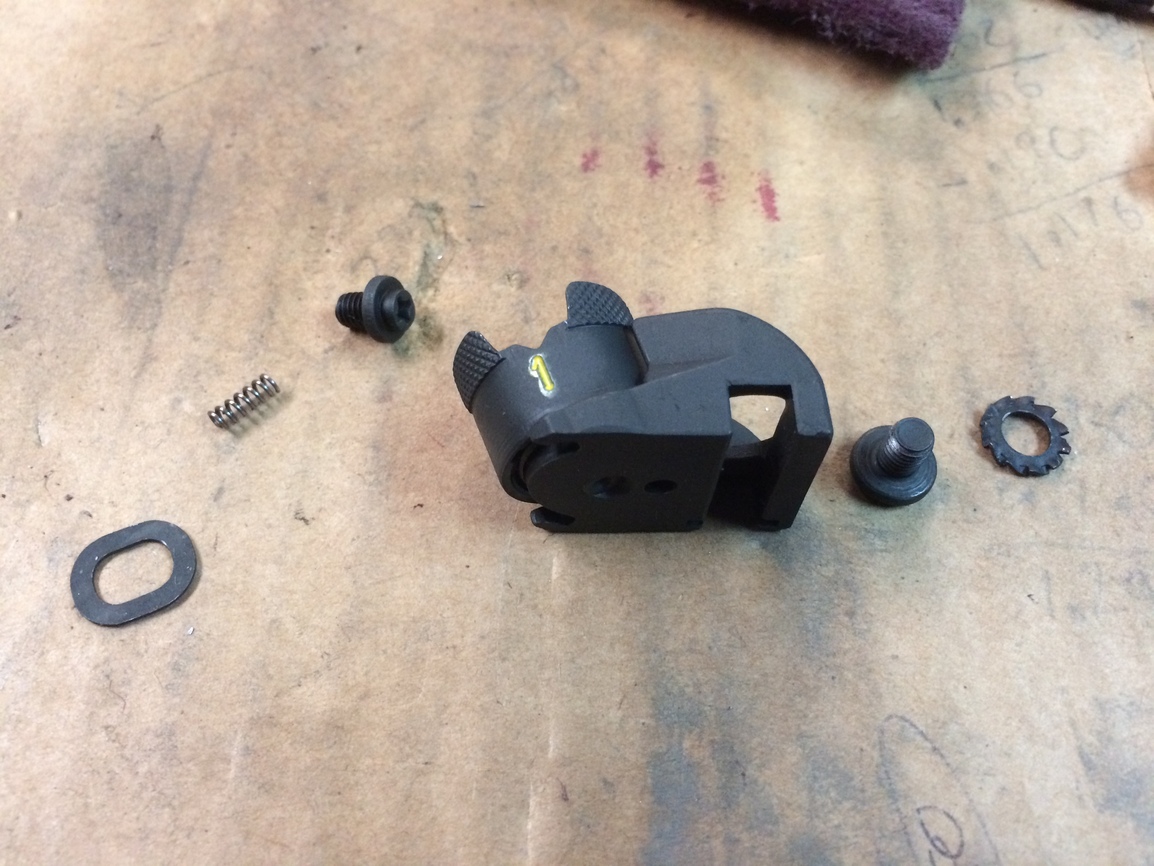
Here is our patient!


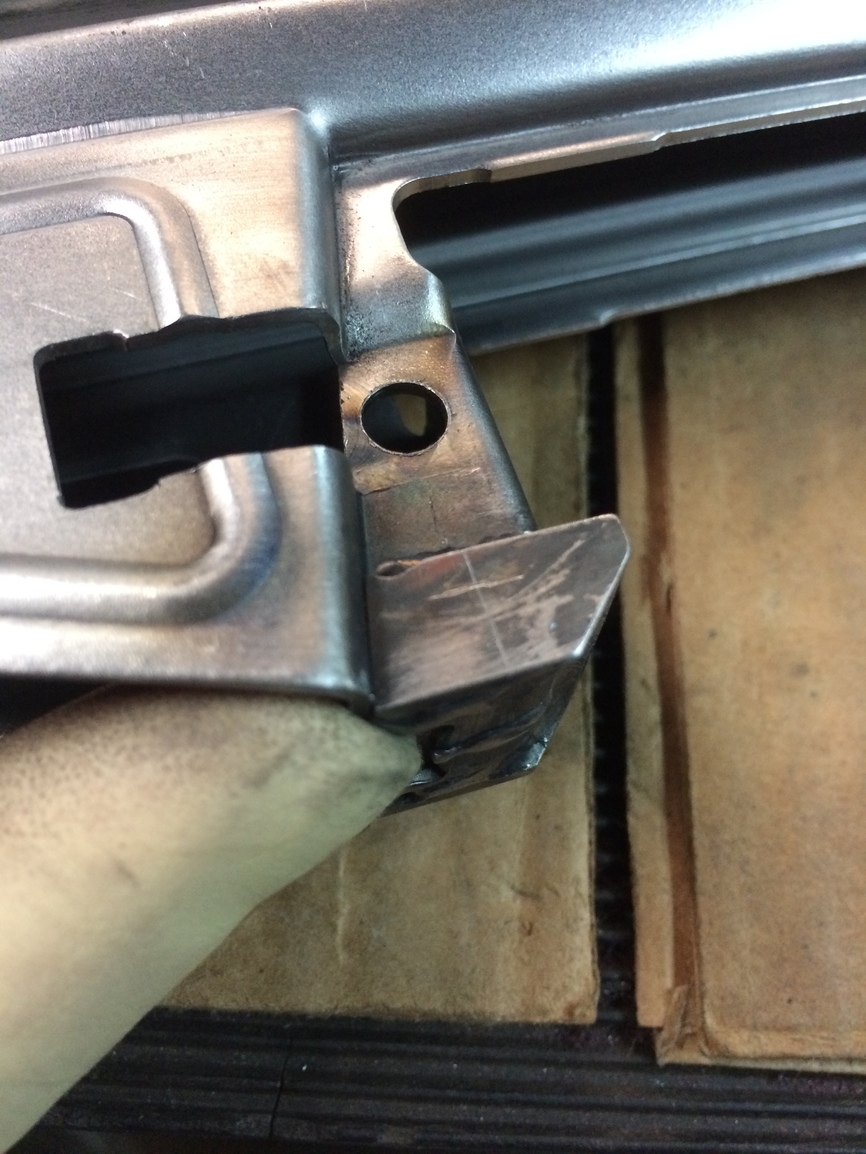
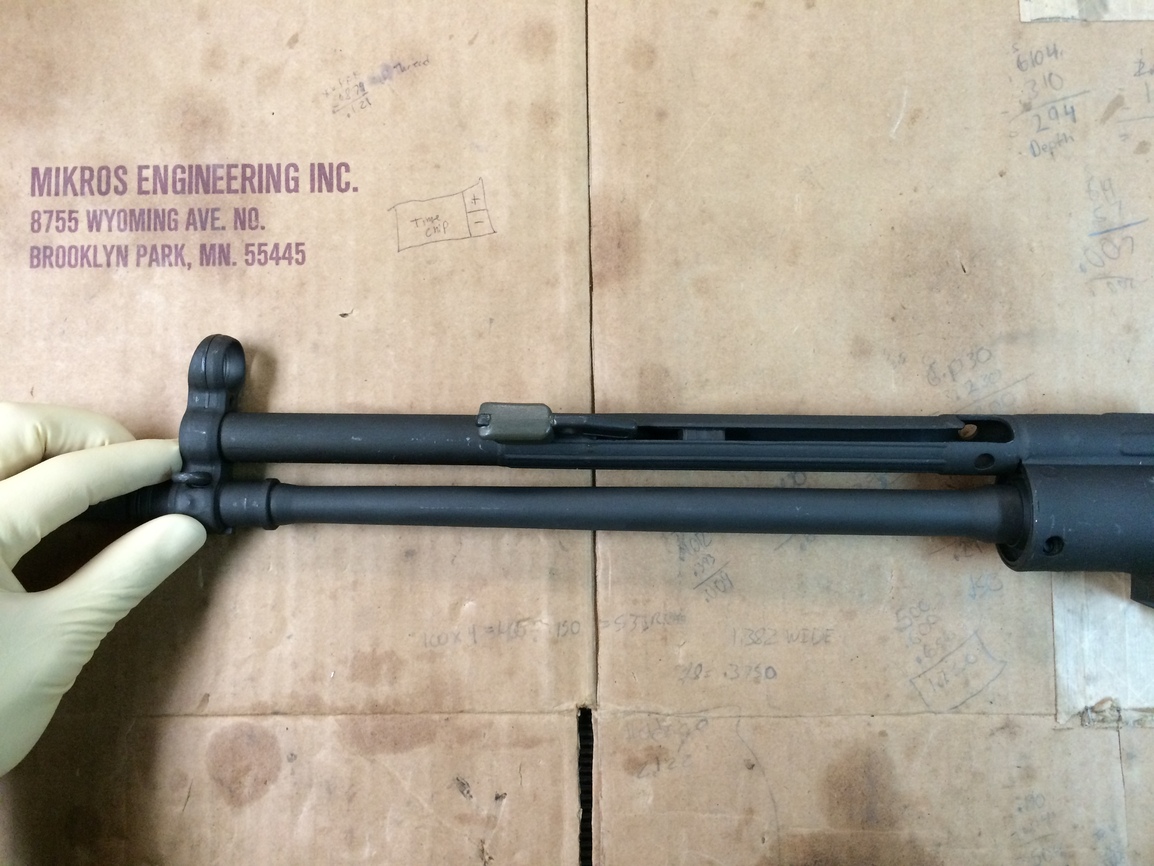
Part one will focus on removing the front trunnion, and charge tube.

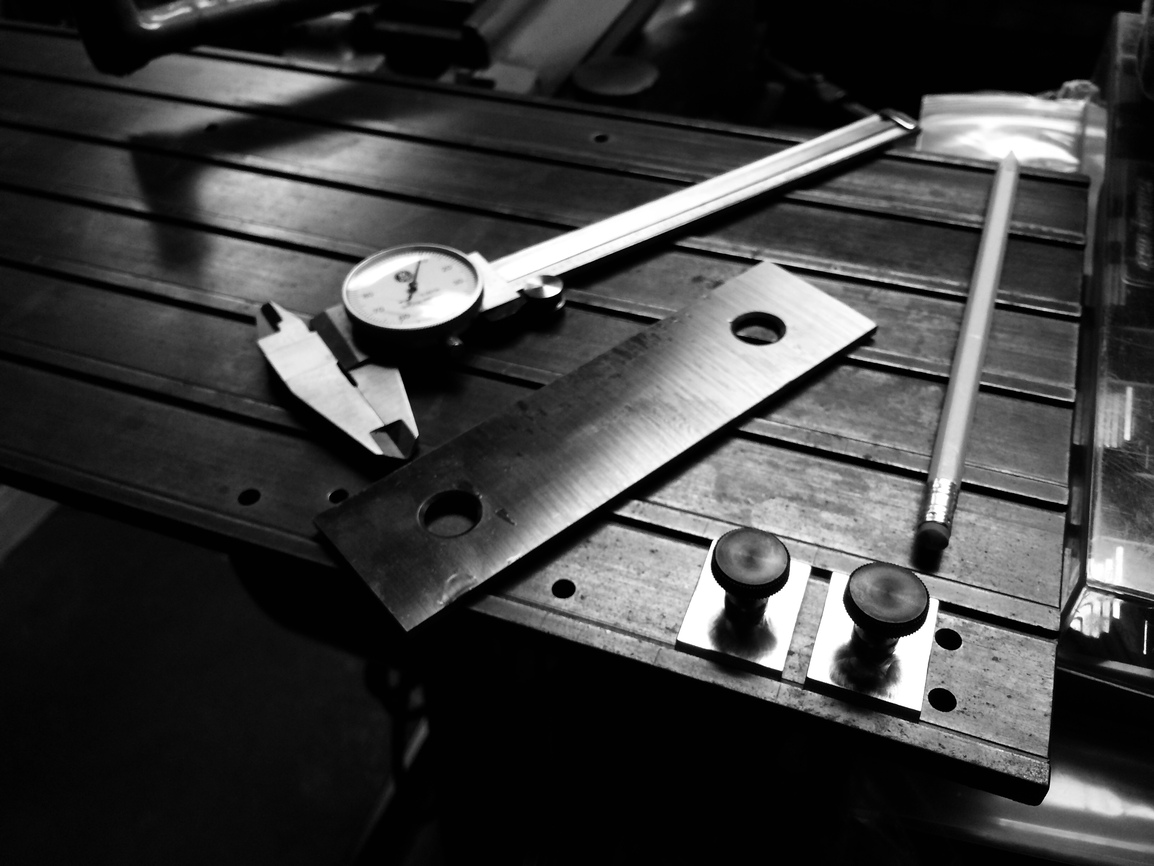
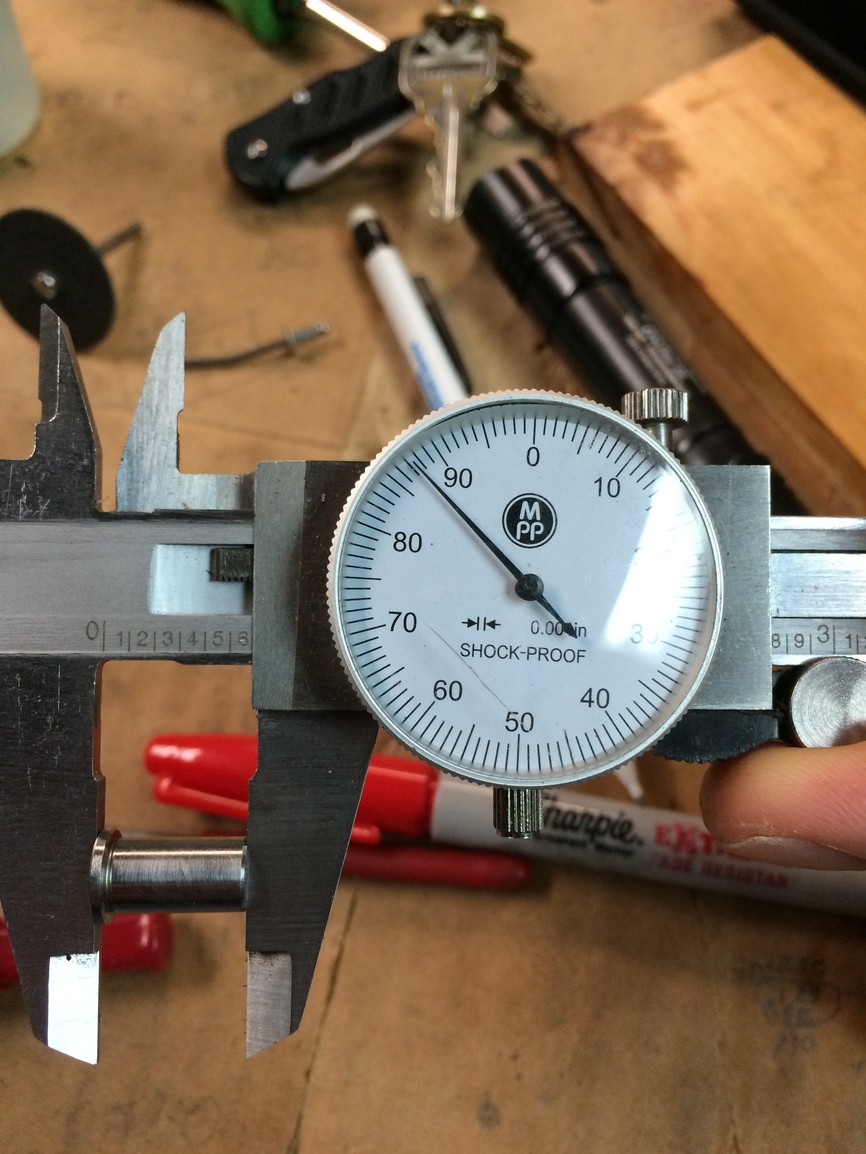
Take pictures and measure all points for when you weld later.
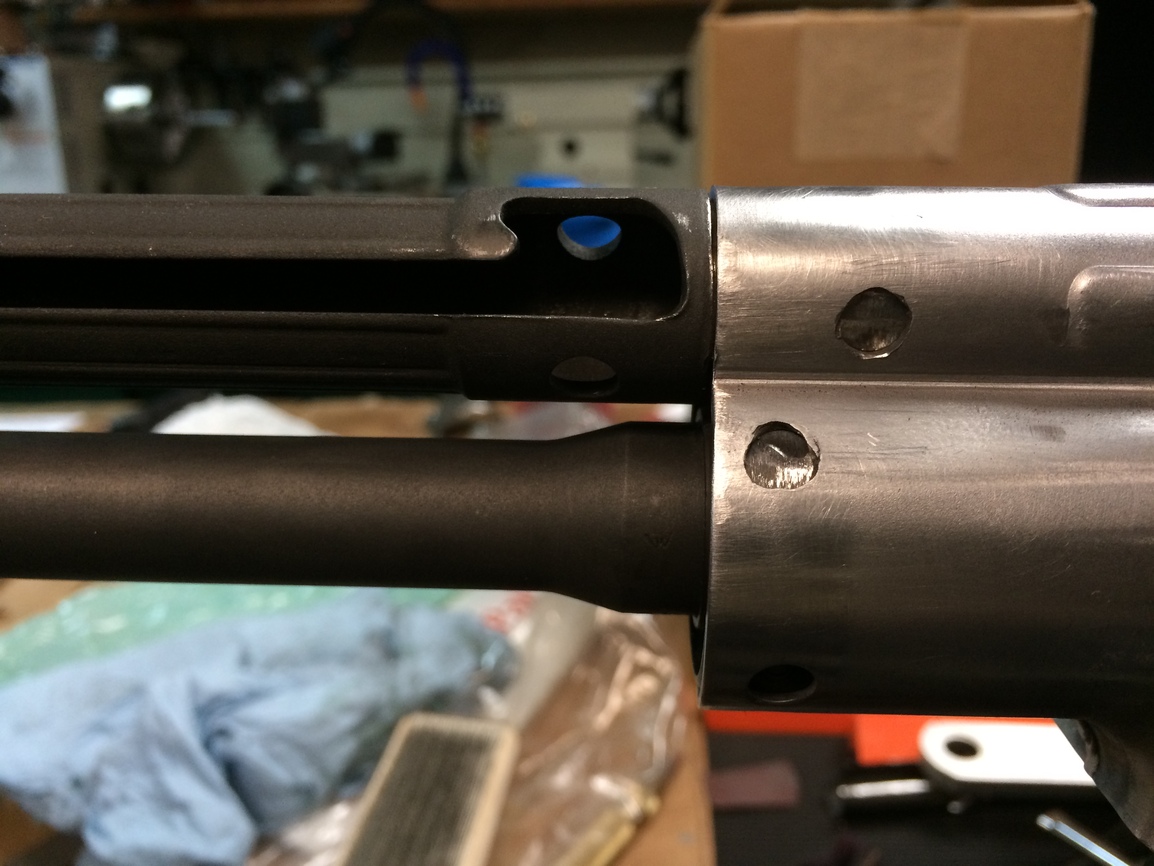
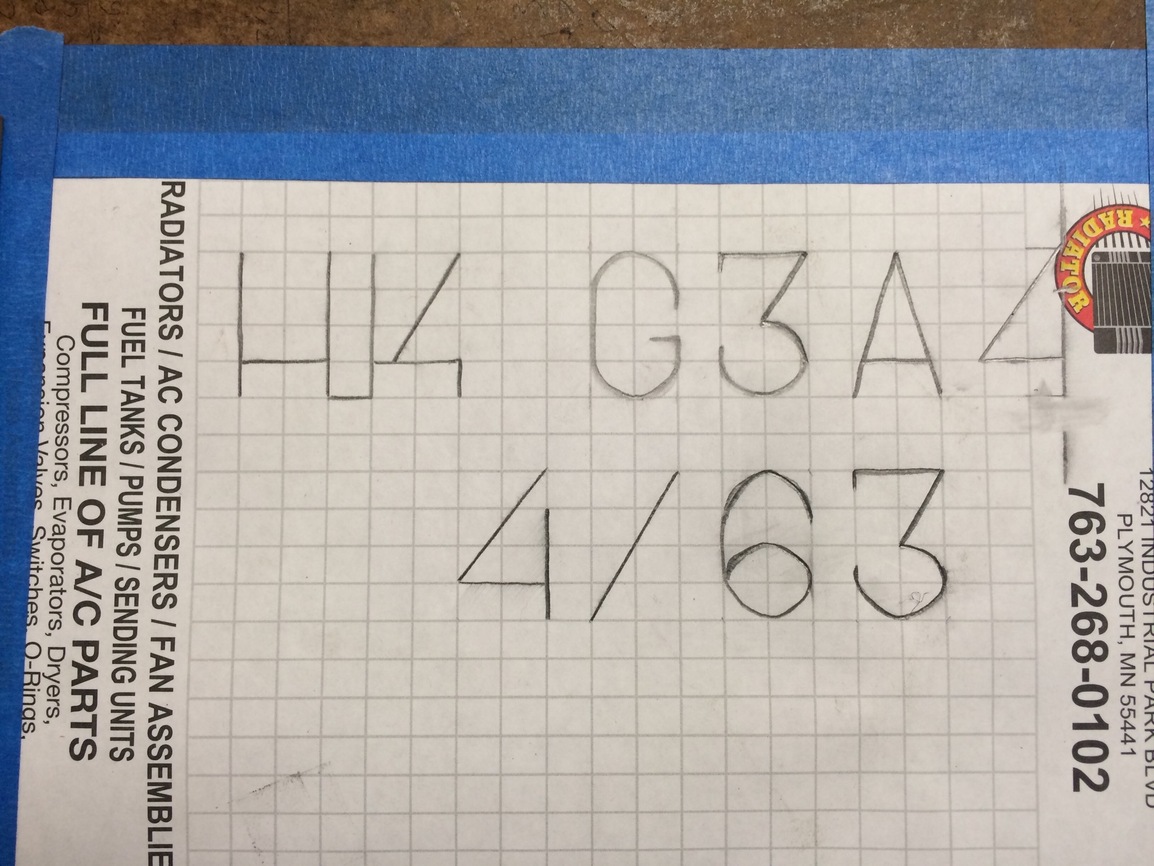
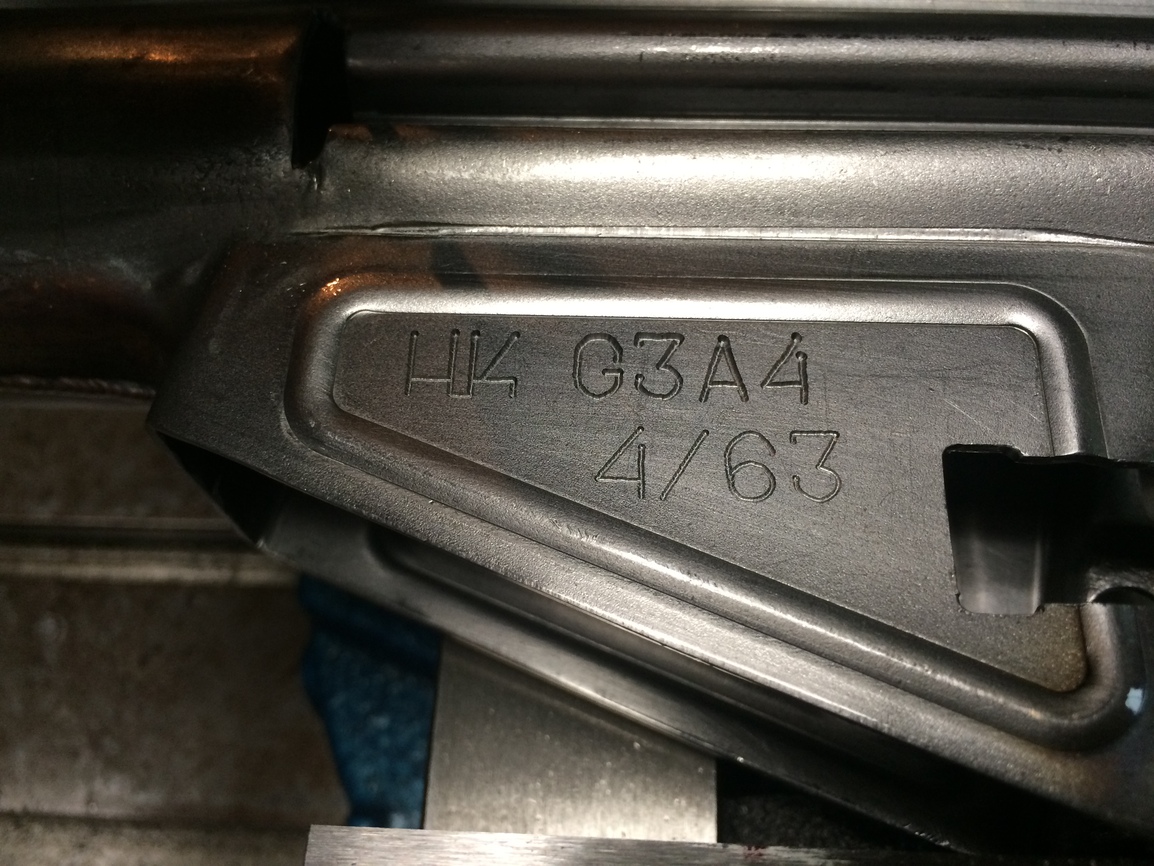
The HK G3A4 and others like PTR and Spanish CETME rifles will all have a inner tube inside of the charge tube. Be carful when cutting off the trunnion so not to hit the tube or cut to deep.

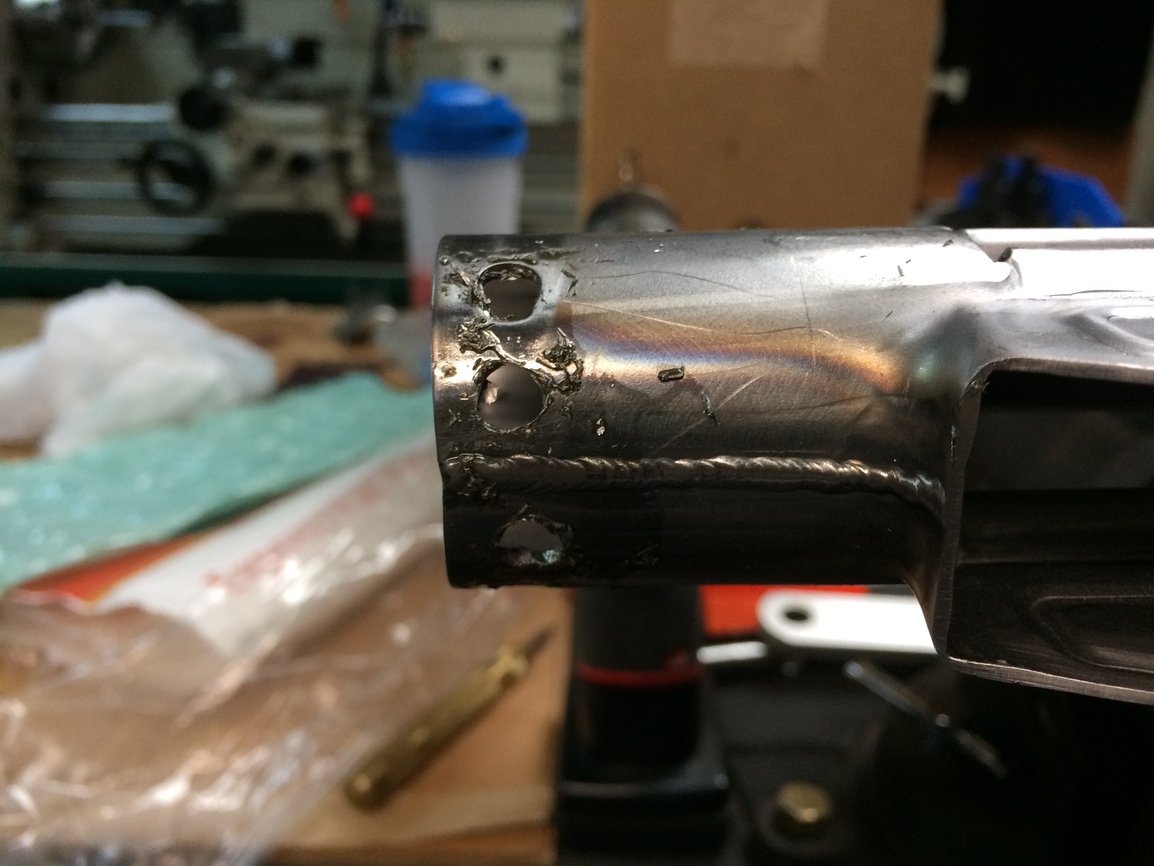
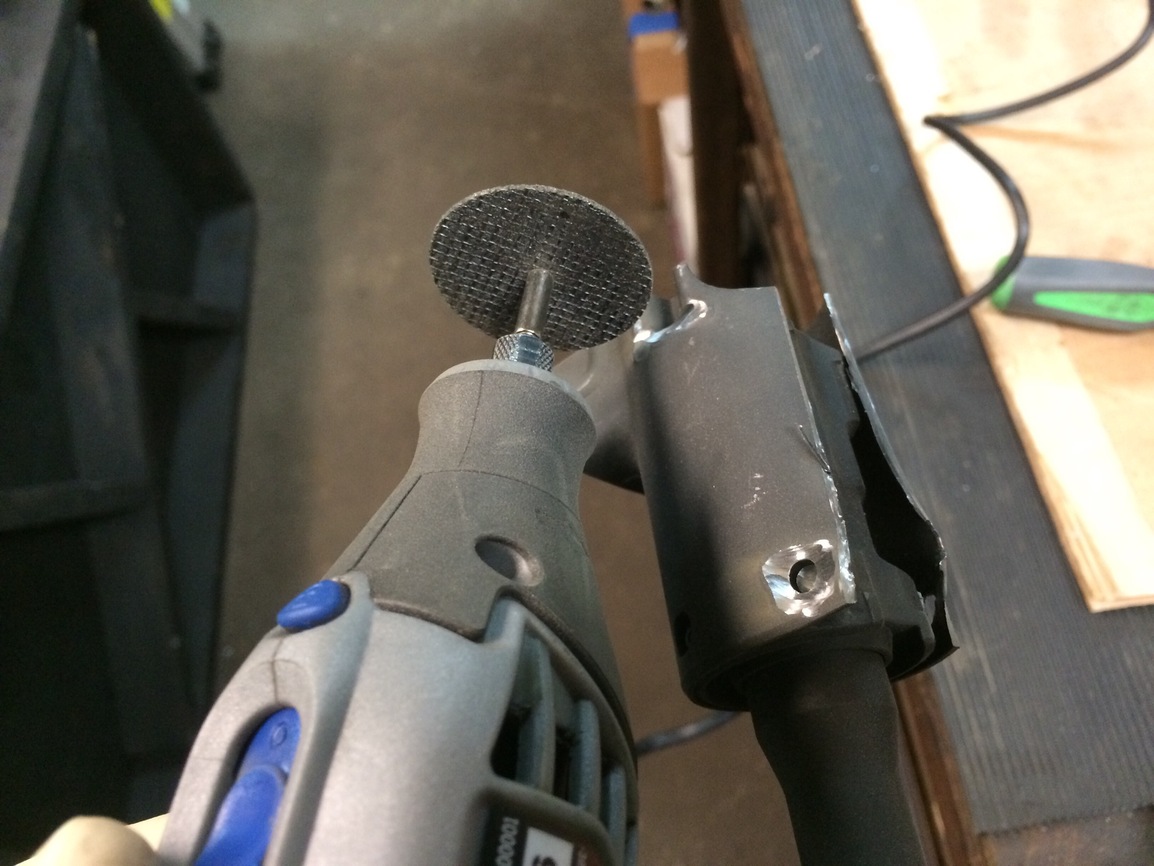
Start by making a horizontal cut on the recever between the charge tube and the front trunnion.

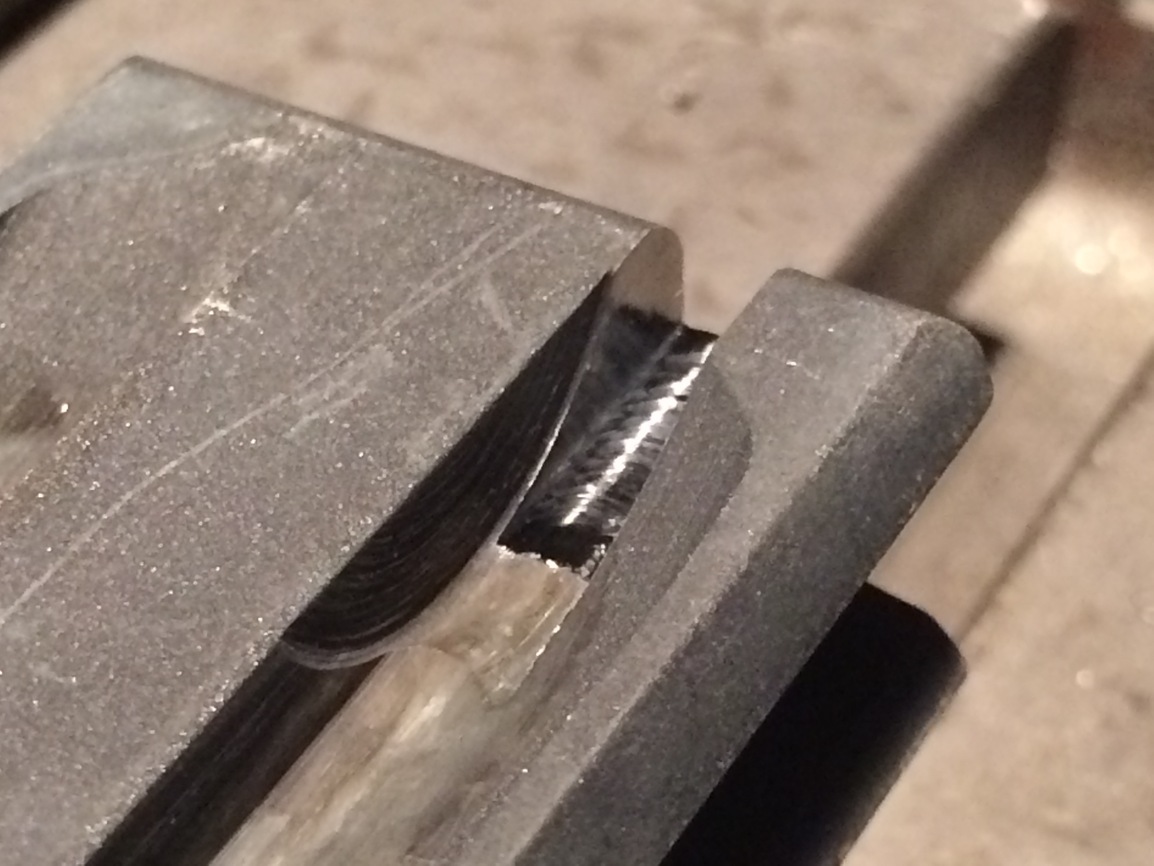
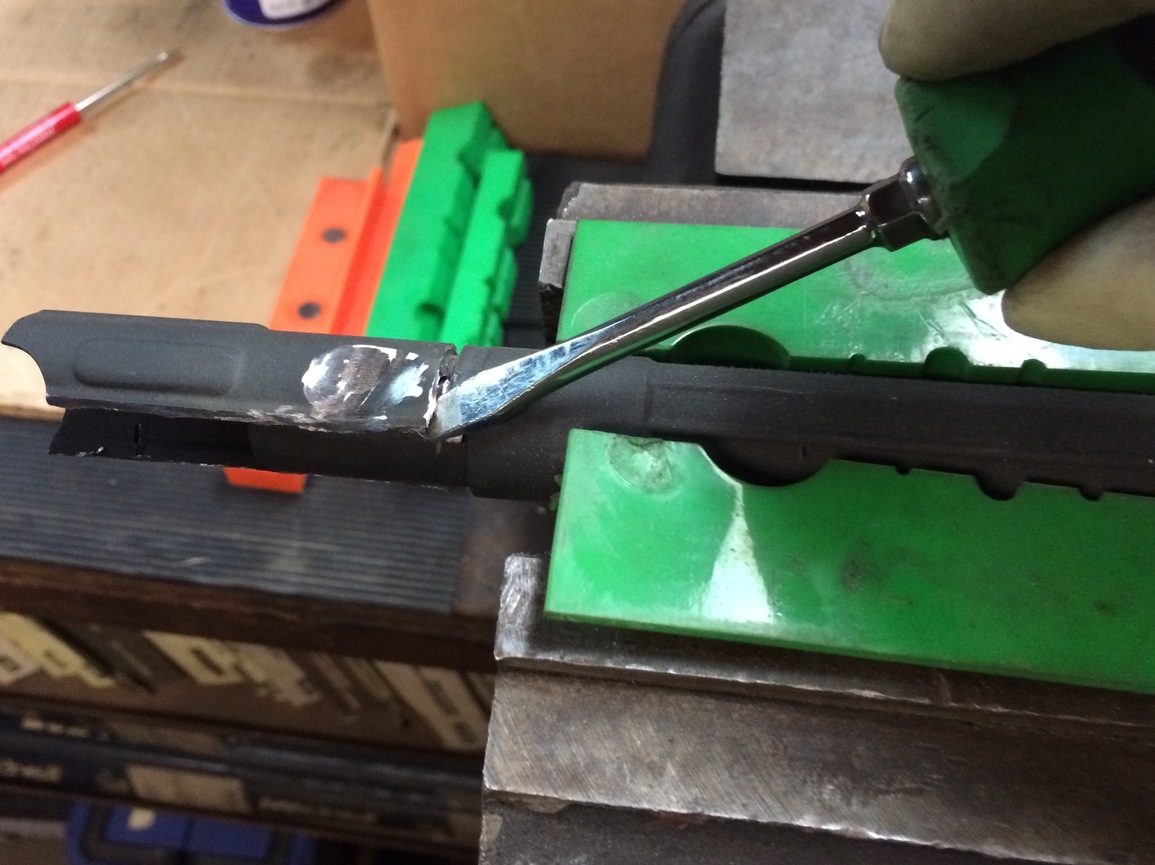
Now cut along the weld across the top. Don’t cut to deep!

Now find and cut into the spot welds on the tube. Not to deep. Use a flat blade screwdriver to help pry up. Cut a little at a time with a dremel and go slow.
There is more than one way to skin a cat so do it in a way and speed that makes you comfortable.
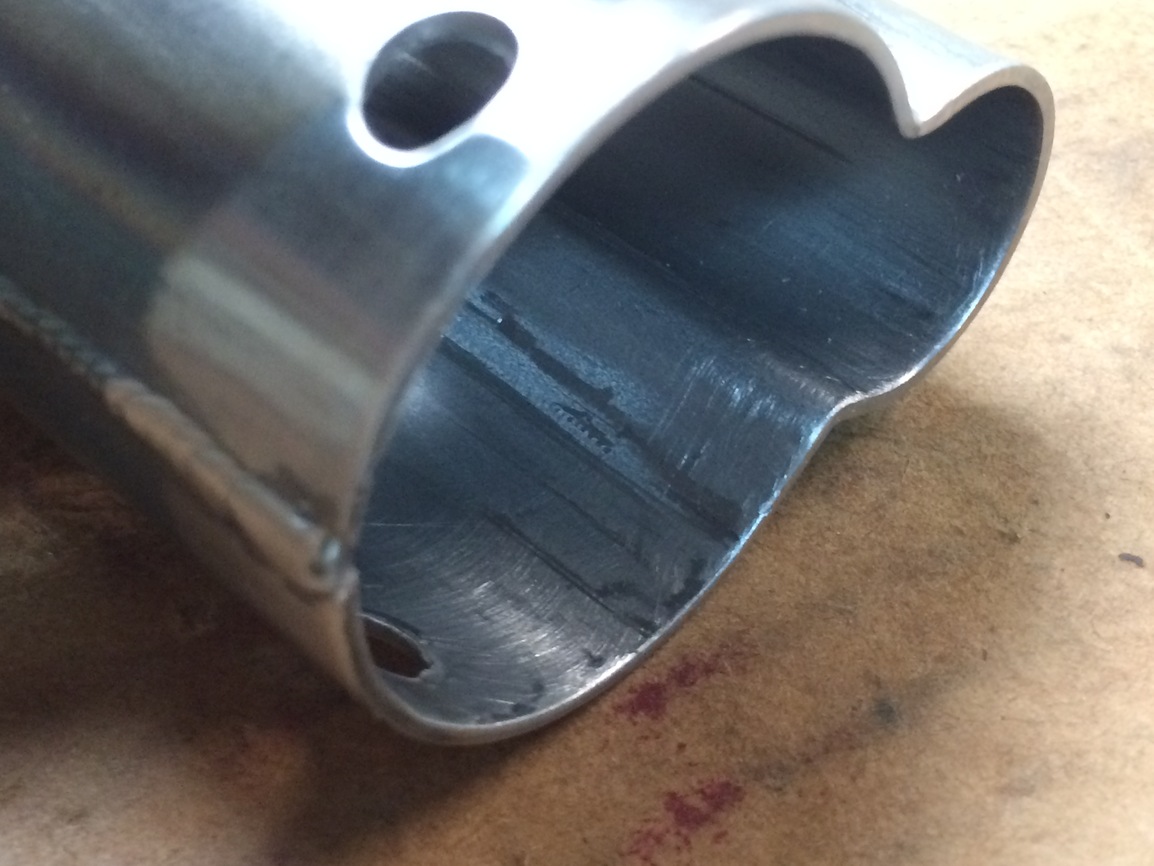
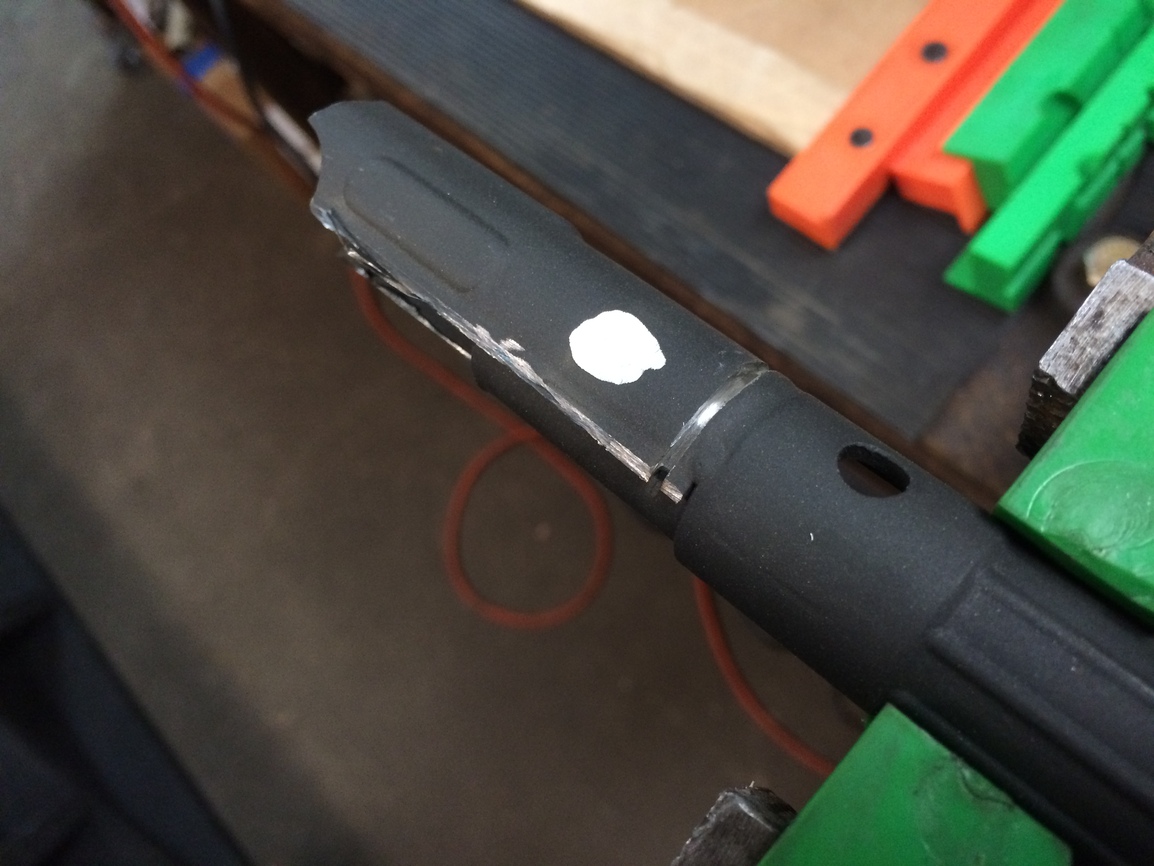
Now that the tube is off you can start filling the spot welds down. Again go slow.

Always cut in a way that will leave you with more material on the parts you keep.
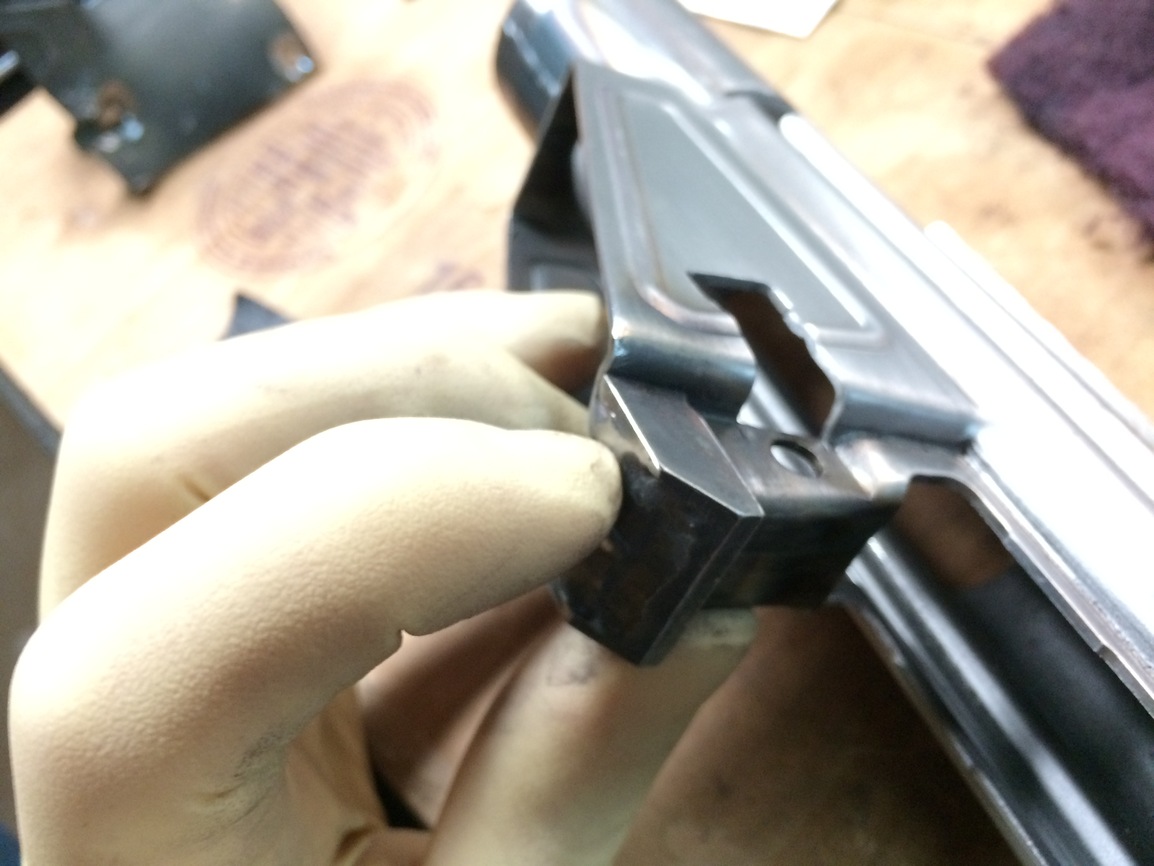
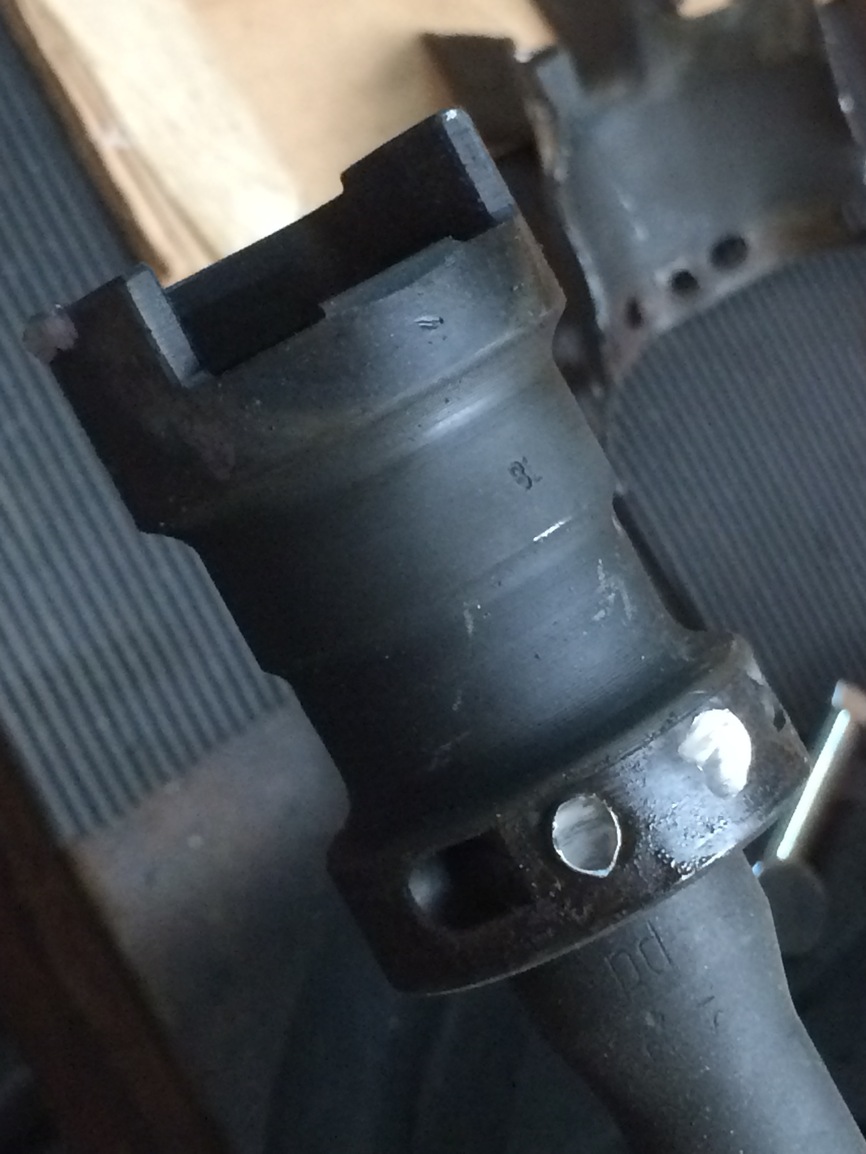
You can see here that i favored the recever side. Now to clean up the mating face of the tube. I’m going to cheat and use a lathe, but you don’t need one.

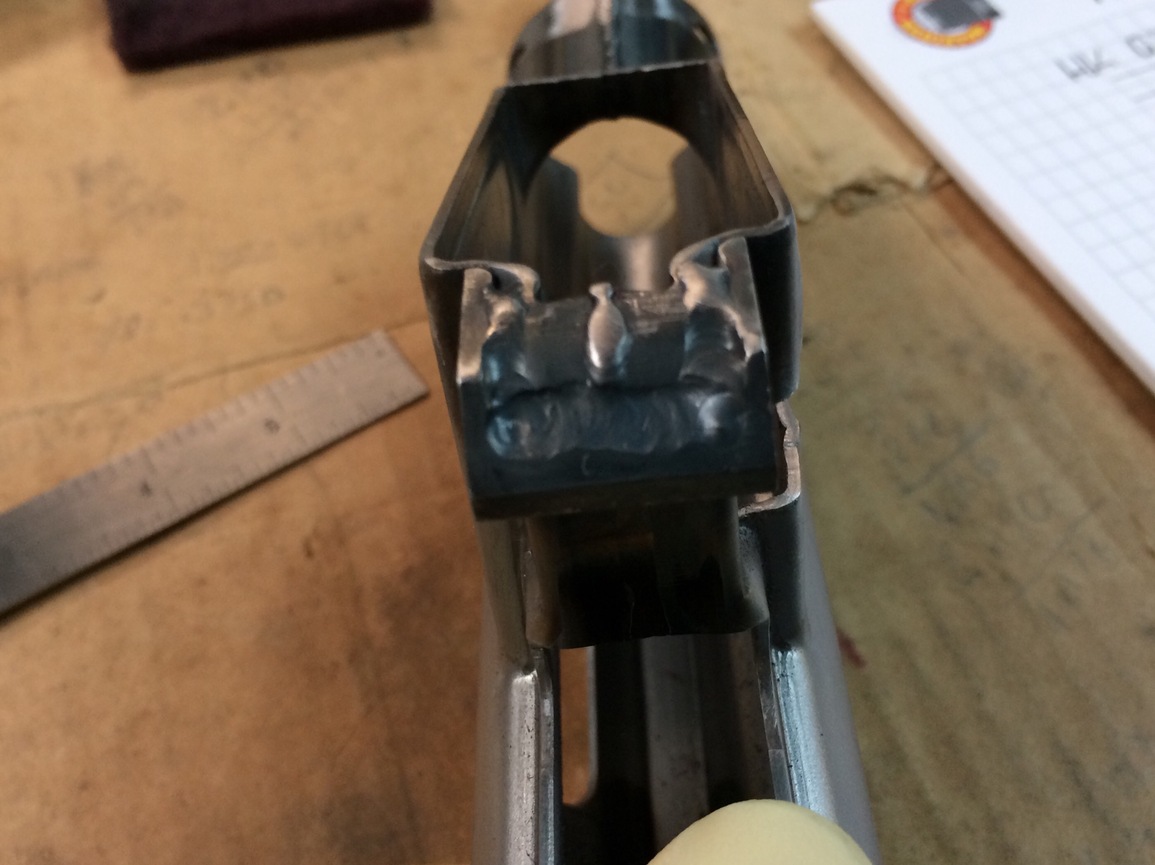
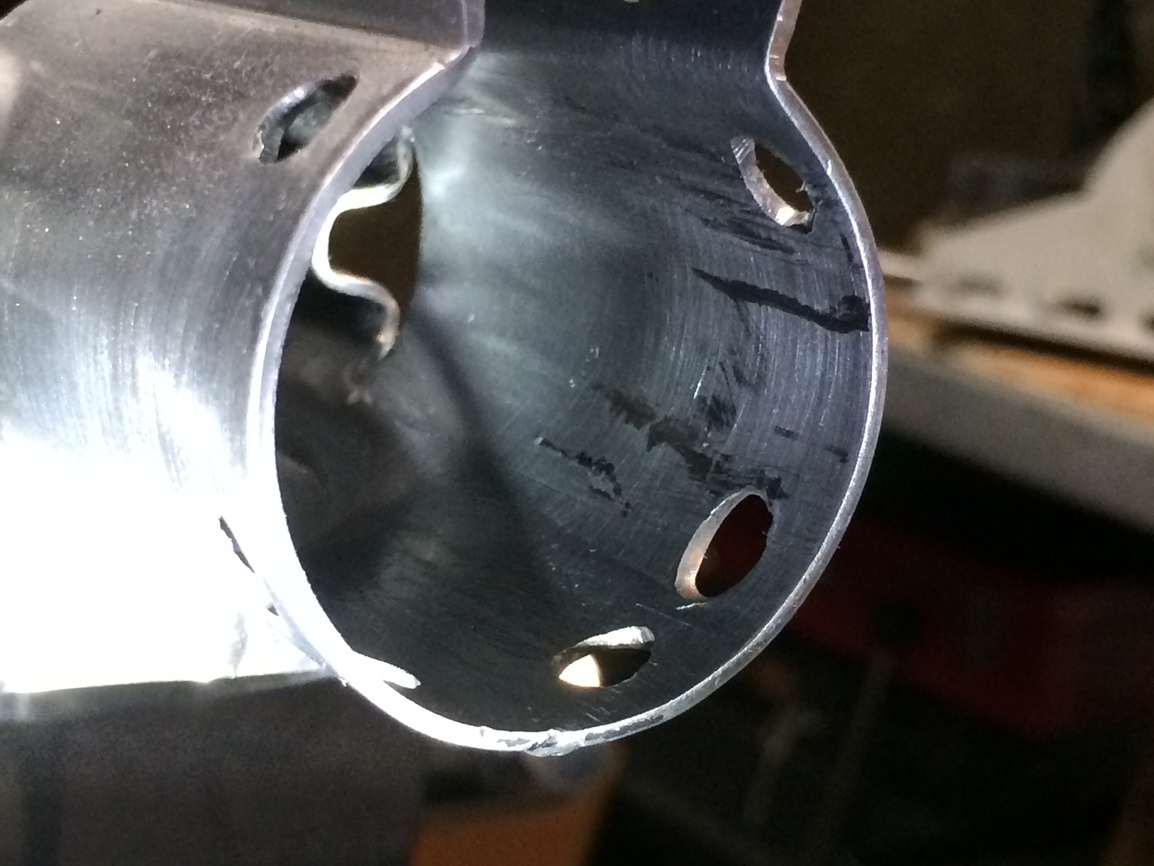
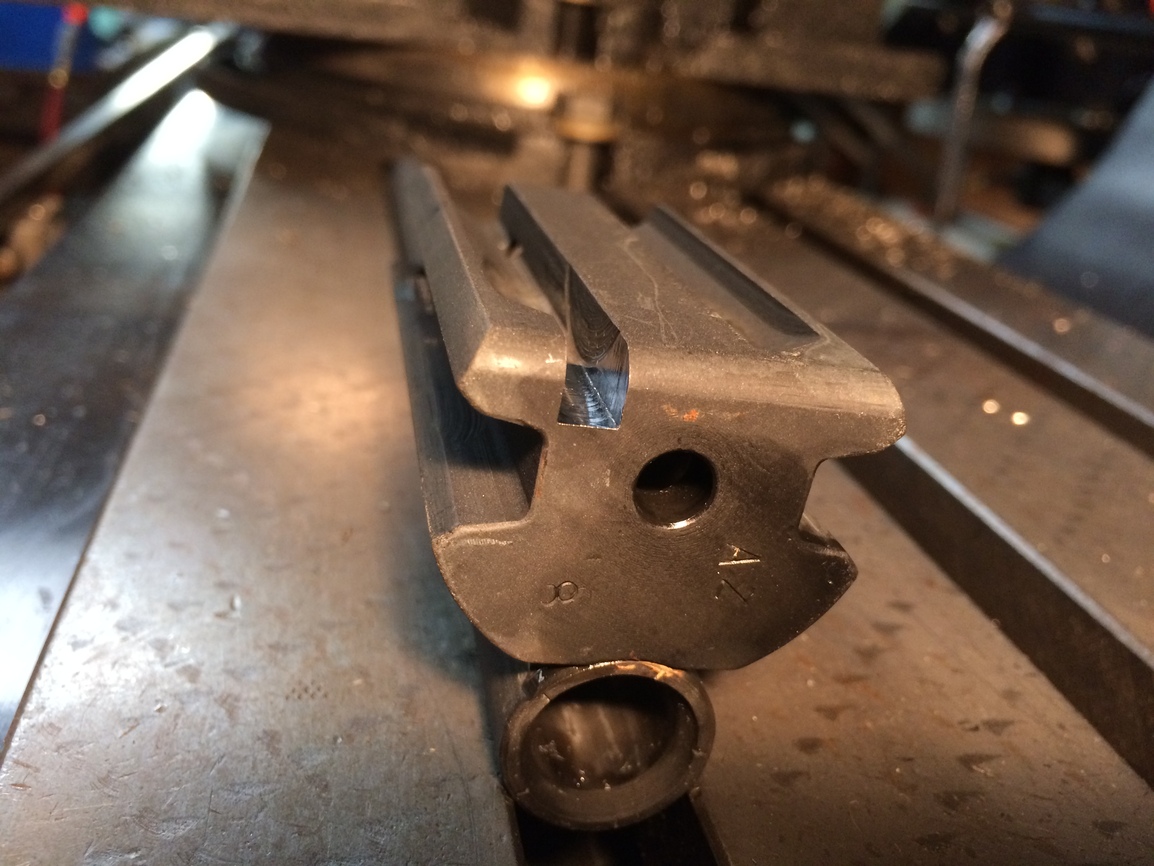
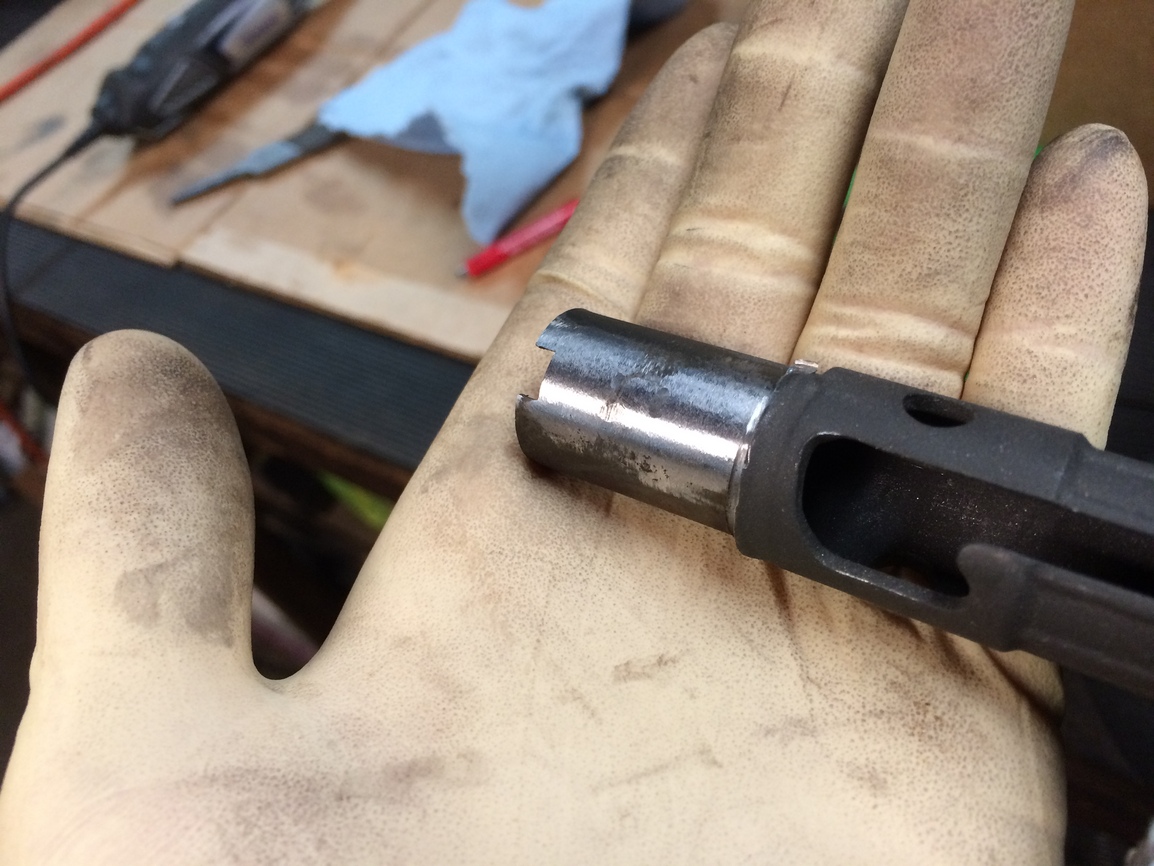
Now you can start removing the spot welds on the front trunnion. Go slow and use a screw driver to help pry up on the recever.

Go slow cutting off the rear weld on the trunnion. Try not to gouge the rear facing area of the trunnion because this will mate up to the new recever.

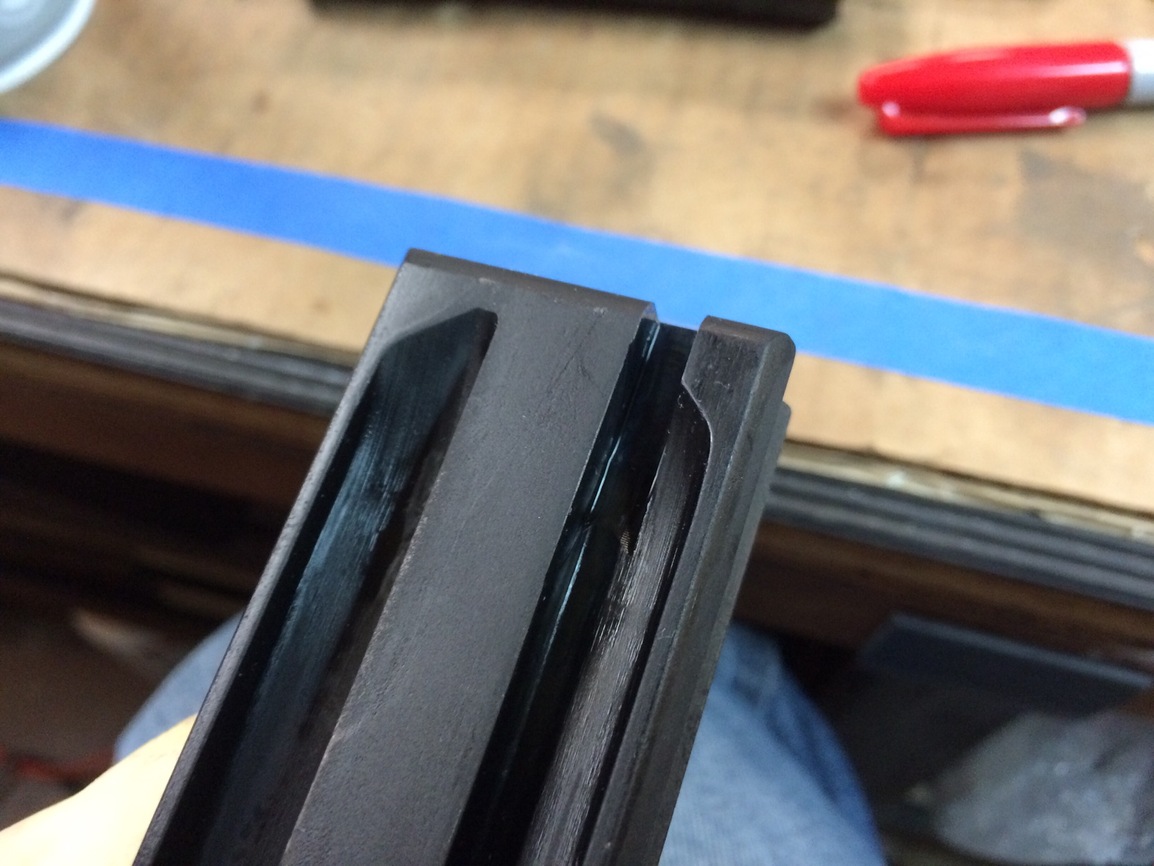
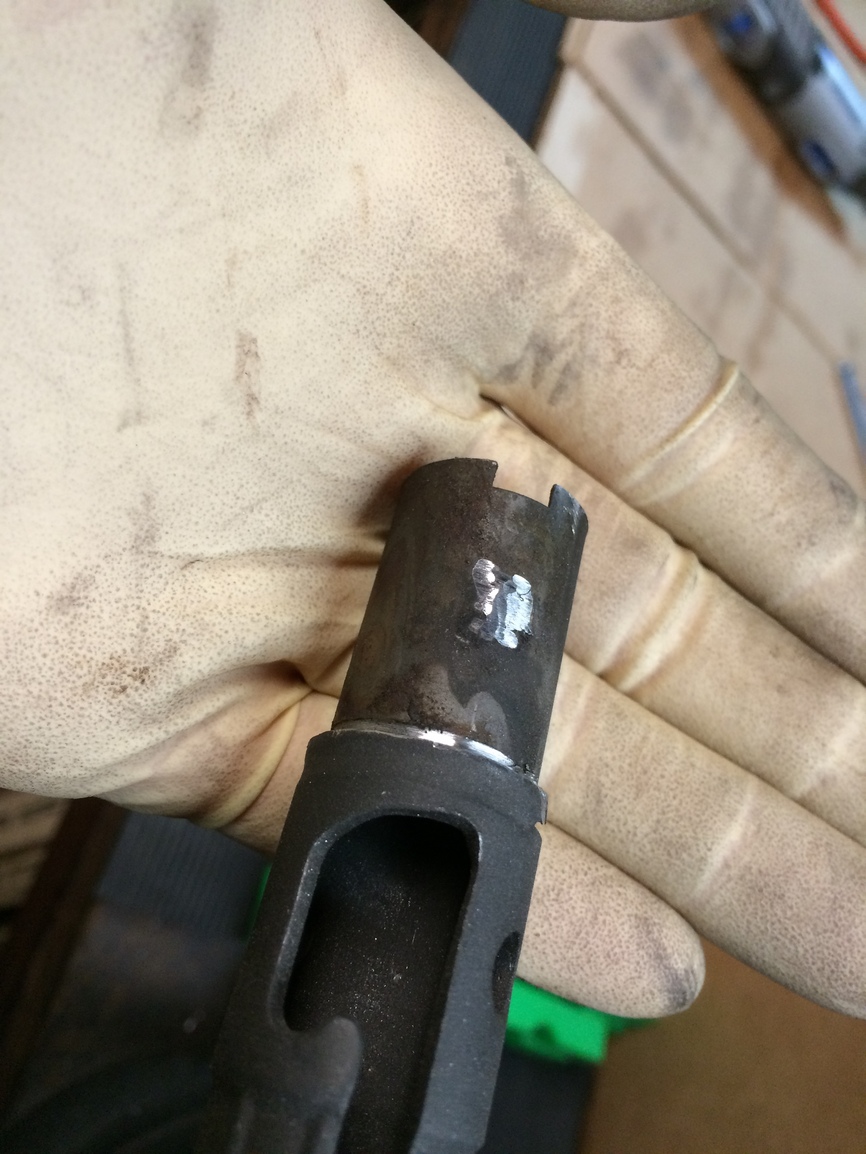
Now you can file down the high spots from the welds.

This will conclude part one.
Be safe and have fun!

8 Likes

Always making me feel just a bit

3 Likes

This is beyond excellent. I can’t wait to see the next installment.

2 Likes

I can’t wait ether. You know better than anyone how long I’ve had this kit just begging to be put together.

1 Like

For sure! I’m looking forward to seeing the receiver portion knowing what route you took. My wife told me no more projects for the time being so I’m going to live vicariously through your build.

1 Like

This looks like a thread I will follow for sure.

4 Likes

Part 2!
Part 2 may seem boring, but is essential to your build. Checking the head space!
Take your bolt/ carrier assembly and barrel and trunnion, insert your go gauge and lock in the rollers into the trunnion. Now measure with feeler gauge to measure the space between the back of the bolt head and the front of the carrier.


For clarity sake I don’t have the bolt in The trunnion, but you can see from the picture that this one measures out at .007” of head space. The spec for a HK G3 is .004-.020 if you are getting a larger measurement or smaller you can buy smaller or larger diameter rollers and install them into the bolt head.

For this build you can buy a flat receiver and tooling to bend it into its shape. The problem with doing that “at the time of this and in my location” you can never sell or give some one this firearm or receiver. In the end you will have to 1. Submit it to the BATFE, or destroy it with 3 torch cuts. They even need to be a certain width of cut.
Because of this I opted to use a PTR for a few reasons.

  1. @ThisOldGun recommend it.
  2. This is a firearm and a S/N. So you have a FFL transfer so in the future I can sell, or hand it down to my kid!
  3. PTR bought HK machines for all their builds so for all intents and purposes it’s a HK receiver built by PTR.
  4. They have a pica tinny rail already welded on them, rear sight base, rear pin reinforcement plate, and the full auto blocking shelf welded in already.
  5. This way I avoid buying expensive bending jigs that I most likely will not use again.

    Next de-bur all of your edges to make them less sharp. Also break the edges on the full-auto blocking shelf (those can get very sharp).

    You can now plot out where you are going to drill the holes for your spot welds on the trunnion and charge tube. Mine are 1/8” so I just used a 1/8th drill bit.

    Now carefully insert your trunnion and see where the scratches are. Lightly sand with 200 grit or higher. Scotchbright works as well to make the parts fit better.

    You can also use a file, lightly if needed.

    Continue to fit and sand as needed until both the trunnion and charge tube makes contact with the receiver stop.

    Install the rest of your parts to check for fit. Make sure you are happy with how everything fits, it’s easier to do this now rather than later when you have the metal parked, painted, or blued.
    Remember Be safe and have fun!
6 Likes

Look at all that awesomeness !!!

3 Likes

Loving it!!!

3 Likes

Nice!!!

3 Likes

Part 3!
It’s that time to make everyone cringe and turn the full auto bolt carrier in to a semi-auto carrier.:expressionless::cry::disappointed_relieved::sob::nauseated_face::face_vomiting:.
This is a full auto trigger assembly and none of this I’m using on my build. I ordered a “navy” PTR trigger group that counts as 5 points to the magic number 7 that I’m looking for to stay 922r compliant. The other two points are the receiver and the flash hider.


Here is the lever that lets the hammer drop in full auto mode.

And here is what it interacts with to know when the carrier is closed and ready to fire. We are going to have to cut this out. You can use a file, dremel, mill whatever you have at your disposal!

I opted to use the mill with a 3/16 full carbide 4flute end mill. It worked like a charm at 2,000 rpms.

When your done don’t forget to treat the metal. And oil it.
Remember be safe and have fun!

3 Likes

Part 4!
It’s time for small parts fitting. And if you want to install a paddle magazine release.


Make sure you have all your parts. In this picture the detent ball for the rear sight is already installed.

Make sure everything fits.
Remember fitting your parts is not fun and takes a long time if you want a perfect fit so take a break every few hour or so.

If your interested in a paddle release you can get a kit of stainless steel bushing and pin, or you can make one.


The pin measures 1.000” long by .125”. The the bushing measures .610” long, small diameter is .295” bigger diameter is .375”, only .055” long of the total .610” length is for the larger diameter. The through hole will be .127”

The pins are both oversized so you will need to trim both of them down to fit.
Mine was .5875” to fit.

Install your contact piece first and then your compression spring, magazine catch, and push button. Make sure everything fits and moves freely.

The full auto block will get in the way of the paddle so you will have to remove some metal on the inside of the receiver.


Go nice and slow cutting a little at a time.
Once that is removed you can start measuring where to drill a blind hole.
Move the receiver to the left side. Note the center of the magazine release hole and measure .610 below center and make your scribe lines. You can use a square for staying straight left-right.
Use a 1/8th drill bit “.125”. Remember do not drill all the way through the far side, just enough to support that end of the pin.

Now install the pin, bushing, and paddle.
See how everything works and use a magazine. You may have to remove some metal so the paddle has clearance. Note if you take to much metal the paddle will rattle. The metal on the receiver will have a bit of pre tension and that is what you want. Once everything works the way you want your done!
Now once everything works good cut the pin flush so you can weld it in later.
Remember be safe and have fun!

6 Likes

Awesome!

3 Likes

Excellent write up!

2 Likes

bla bla bla

2 Likes

Sorry guys. I have been extremely busy as of late.
Every build you do you should always have a personal touch that makes it fun for you. I don’t do my builds to be 100% original looking. My goal is to have fun not trick anyone into thinking a build is original. With that said I looked into stampings that the G3 would have.
With my current time restrictions I had to make it quick on this little accent.


So this is what I came up with.

I used a 40 degree bit for the engraving.
Remember it’s your build have fun with it. Make it your creation!
Be safe and have fun.

5 Likes

Awesome!!:slight_smile:

2 Likes

GORGEOUS!!!


small words so its not unclear to the software

2 Likes

WOW I am so impressed with the presentation and layout. I feel as though I am right there sweating with you. The attention you provide to correctly fit and finish the stages to function properly but also there is the reminder that there is an element of fun and accomplishment to be gained. Do you keep the work area in your shop always so neat and tidy? I really enjoyed watching your project, thanks!

3 Likes

Thank you. I do the best I can with what I have. I keep the areas as clean as I can with in reason. I have been extremely busy and had to get a refill of Argon gas for welding, so in the next few weeks hopefully I can get some more posts up.

1 Like