This spot on the lower hand guard has been bugging me so I had some time to start doing a refinish
Word of caution this is not a project that will be completed in a few hours if you want your peice to look good there is drying time involved with the stain penetration
Removing the exsisting finish
There are several ways to remove a exsisting finish I prefer the sanding method
I start with a 60 coarse to remove all the exsisting finish
Make sure you remove all metal before you start it makes the process that much easier
I generally hand sand or use a wood block in this process
You can use a electric sander but I prefer not too
60 coarse is the first price of sandpaper you will use
Depending on the dings and damage to the pieces do what look your going for bfpu or a nice smooth wood is how much I sand with the 60 paper
Warning do not go to town with a electric sander you can and will change the shape of the wood
once your to this point I ussualy change paper to a 120 medium smooth to finish out the wood sanding and get a nice smooth finish
Depending on what I want or the customer wants you can go to a 200 fine smooth paper if you wish
I generally don’t myself but it’s the users choice
Once your sanding is a done and your work piece is free of dust this is what you will need to move on to the next stage of actually staining
Ofcourse use gloves during this process if you don’t want diffeent colored hands
If you want the grains and patterns in the wood to be dark in color I ussualy start with this
a sponge brush
Or a simple shop rag will suffice
Allow the piece time to dry between coats ample time depending on the time frame sometimes I let it dry overnight
Important note
When applying make sure there is no bubbles or pockets of air with your base coats this will affect your final finish if you leave them there
Next you choose and mix your color
for educational purposes I have these dyes on hand I’m waiting for the emerald to be delivered
Rit dye also works well
I haven’t been able to find to much of the powder dye latley (they changed the formula so it doesn’t mix well with poly anymore) sonive switche to liquid
I generally mix with a poly in a
and mix very well
I find the mason jars work well against spillage and it help keeps everything over a period of time that your using the mixture
It also allows you to mix bigger quantities if your working on several pieces
I’m going to stop this here until I have the emerald dye in hand so I can go through the whole process of changing and getting the color your looking for
Side note
I forgot to add this in the sanding section
Not all furniture is drop in
It requires fitting and sanding this part can be crucial if your not checking against your receiver often you should be
Fitting the stock can be tedious but it’s worth it
To often you see things like this
Thanks @Robert I’m always doing things like this but I always forget to take photos or things like that I hope this helps some folks here
If you have questions or need more detail please feel free to ask
She takes care of the kid a lot of times after she gets off of work that allows me a lot of time in the basement working in the shop
She doesn’t mind so much because the side work pays a lot of bills and she likes to spend money
My job affords me access to customers a lot of the time that don’t want to pay the 90 a hour labor fee
So I get a lot of work that way as well as word of mouth from people I have done things for in the past
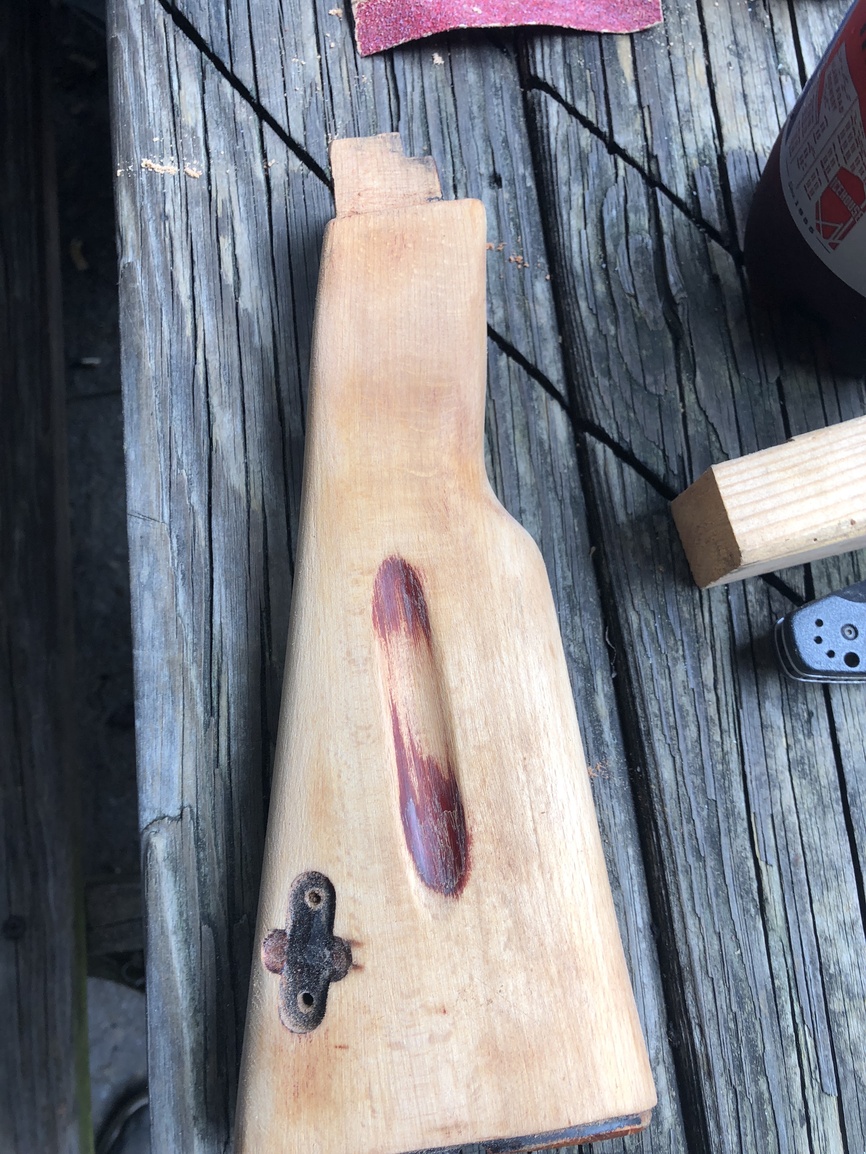
This is the first coat of minwax to bring out the grains as you can see there are some air bubbles I used a sponge to apply the first coat and let it sit for a few minutes not very long at all
I just want the grains of the wood to darken up a bit the using a rag gently rubb the stain into the wood and removing the excess
The base coats of the minwax are finished and completely dry (2 days ) still waiting on the emerald dye to arrive so I can do a test and see if that’s what I want to do
On the other hand, I take off my furniture, stomp it into the gravel, beat it with a chain, etc. Then, I paint it black before roughly sanding the high points. Finally, I smear on some stain and spray with a matte-clear finish. Give me the “battlefield pick-up” look every time.